When i first got my Audi A3 i really missed the cruise control system that my A6 used to have, such a simple but worthwhile feature.
Eager to get this back i decided to do a bit of “hunting around” to try get it back, i quickly came to the realisation it might be an Audi/Dealership thing to get done.
I called up Audi expecting them to quote £100-150 odd to get this done, i had to hand over loads of details (VIN, Reg, year etc) and after 3 phone calls the quoted price was a purely ridiculous £750!
What a waste of time and money, after some research i discovered the parts cost depending on new/second hand can be around £50
That’s exactly what happened with me i got the plastic and the stalk for £50 delivered and so began the DIY/Guide – with determination to beat the dealer.
Parts Needed:
- Compatible Stalk
- The are 3 part numbers for this:
- 2003 – 2010: 8P0 953 513 B or 8P0 953 513 D
- 2010 – 2013: 8P0 953 513 F
- The are 3 part numbers for this:
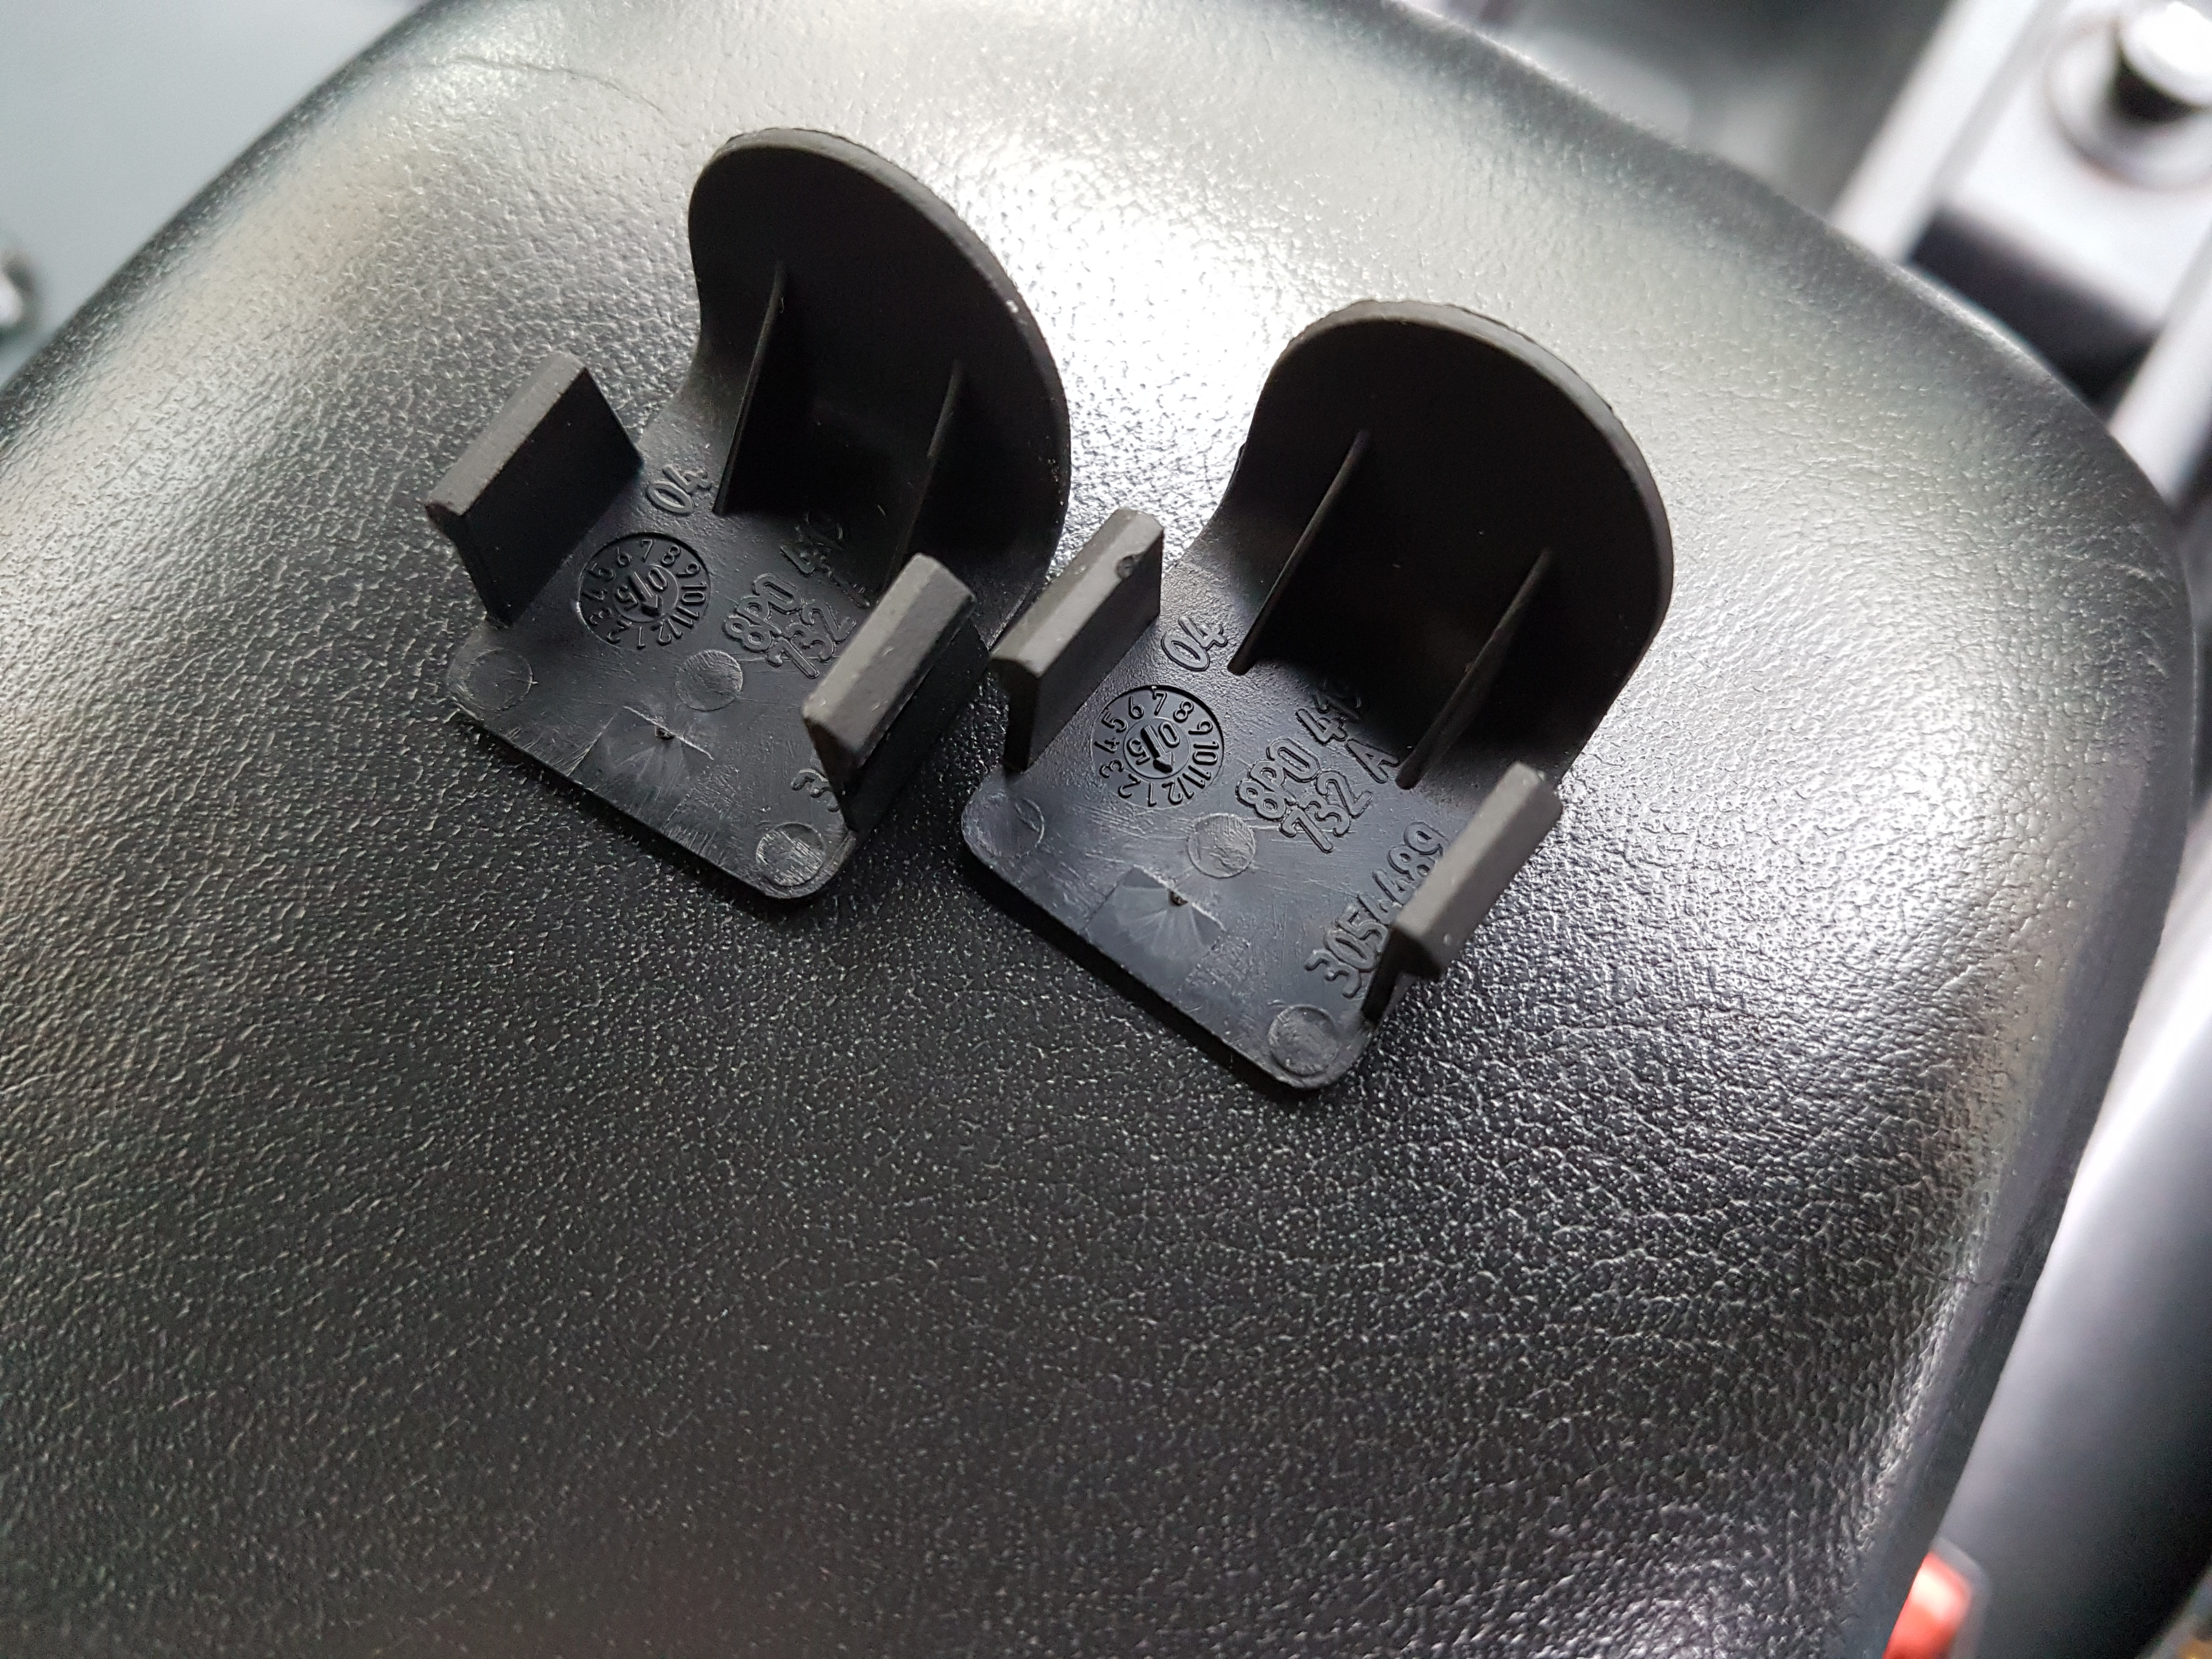
- Lower Plastic cowling
- 8P0 953 512 A
- Access to VCDS/VAG Com setup (to code it)
- Compatible Steering ECU
Tools Needed:
- T25
- T9
- M12 Spline Bolt
- Tape
- Small Allen key
- 1-2 hours of time
Note: This process involves unplugging some important devices to the cars system (ECU, Steering wheel and airbag) if you are not comfortable with this then it may be best to get a professional to do this, and of course we are not responsible for damage done.
Step 1: Remove Airbag + Battery Disconnect
For me this was one of the most scary parts of this retrofit, i mean no one wants an Airbag in the face!
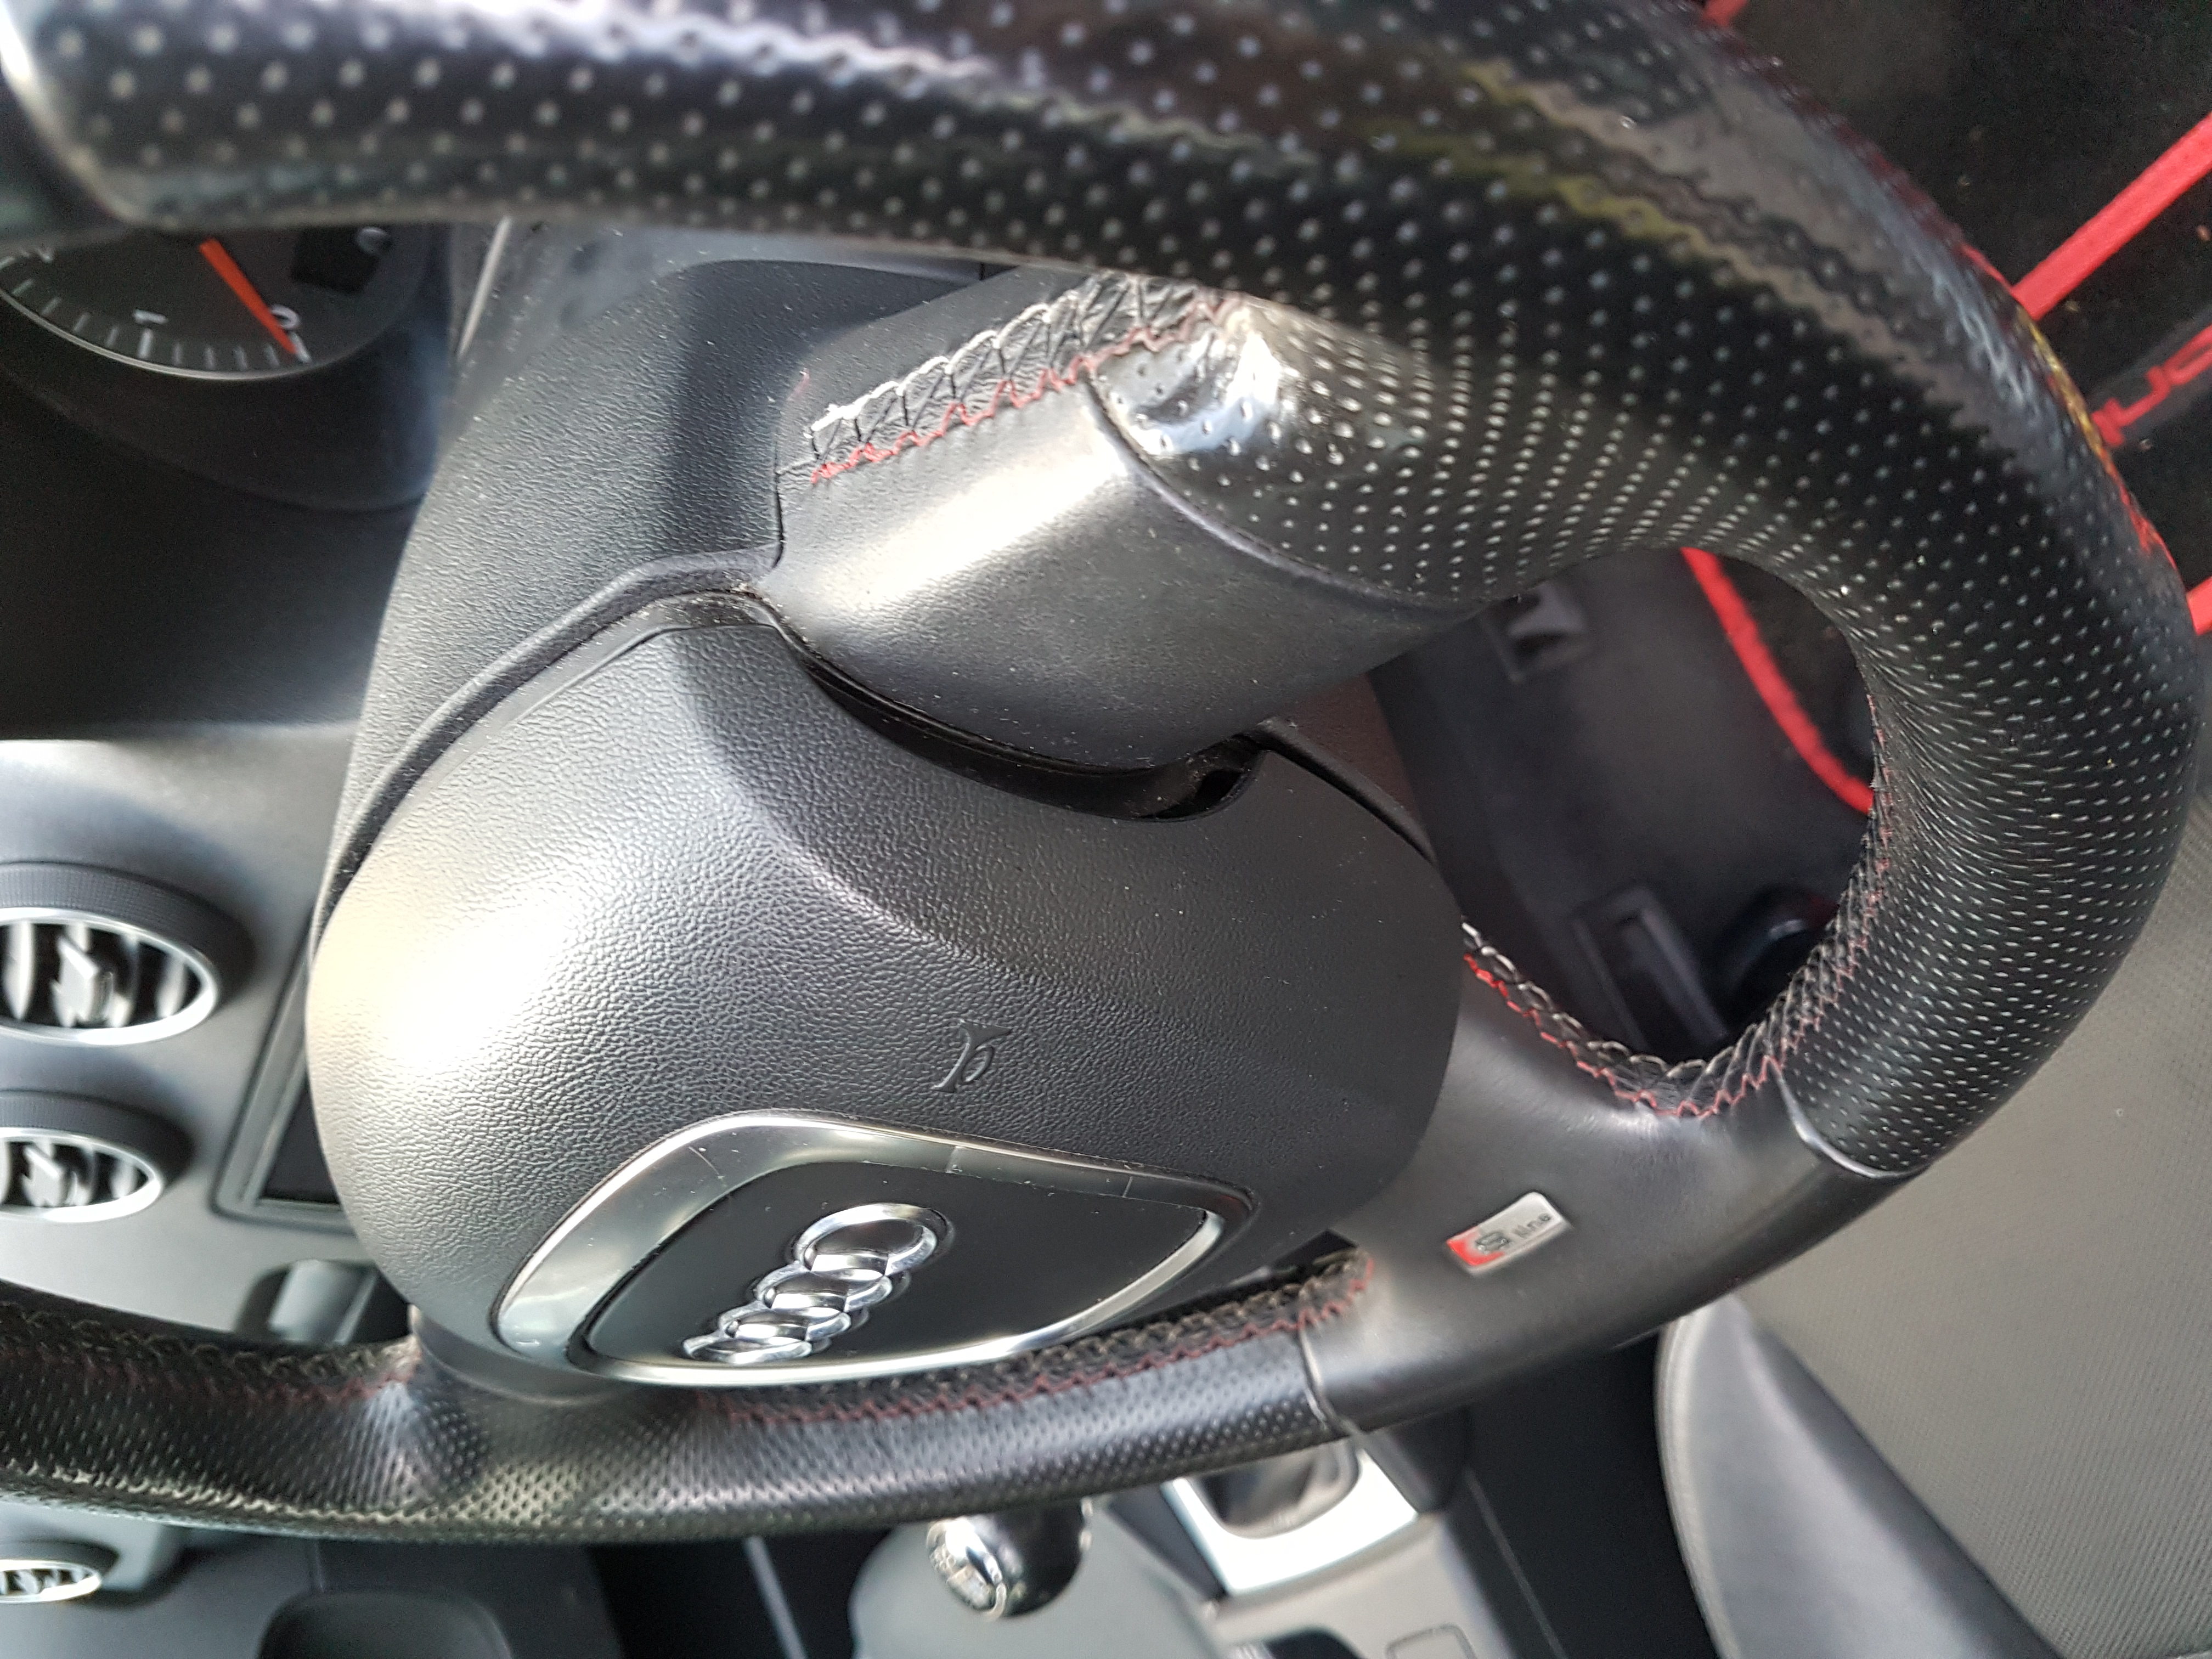
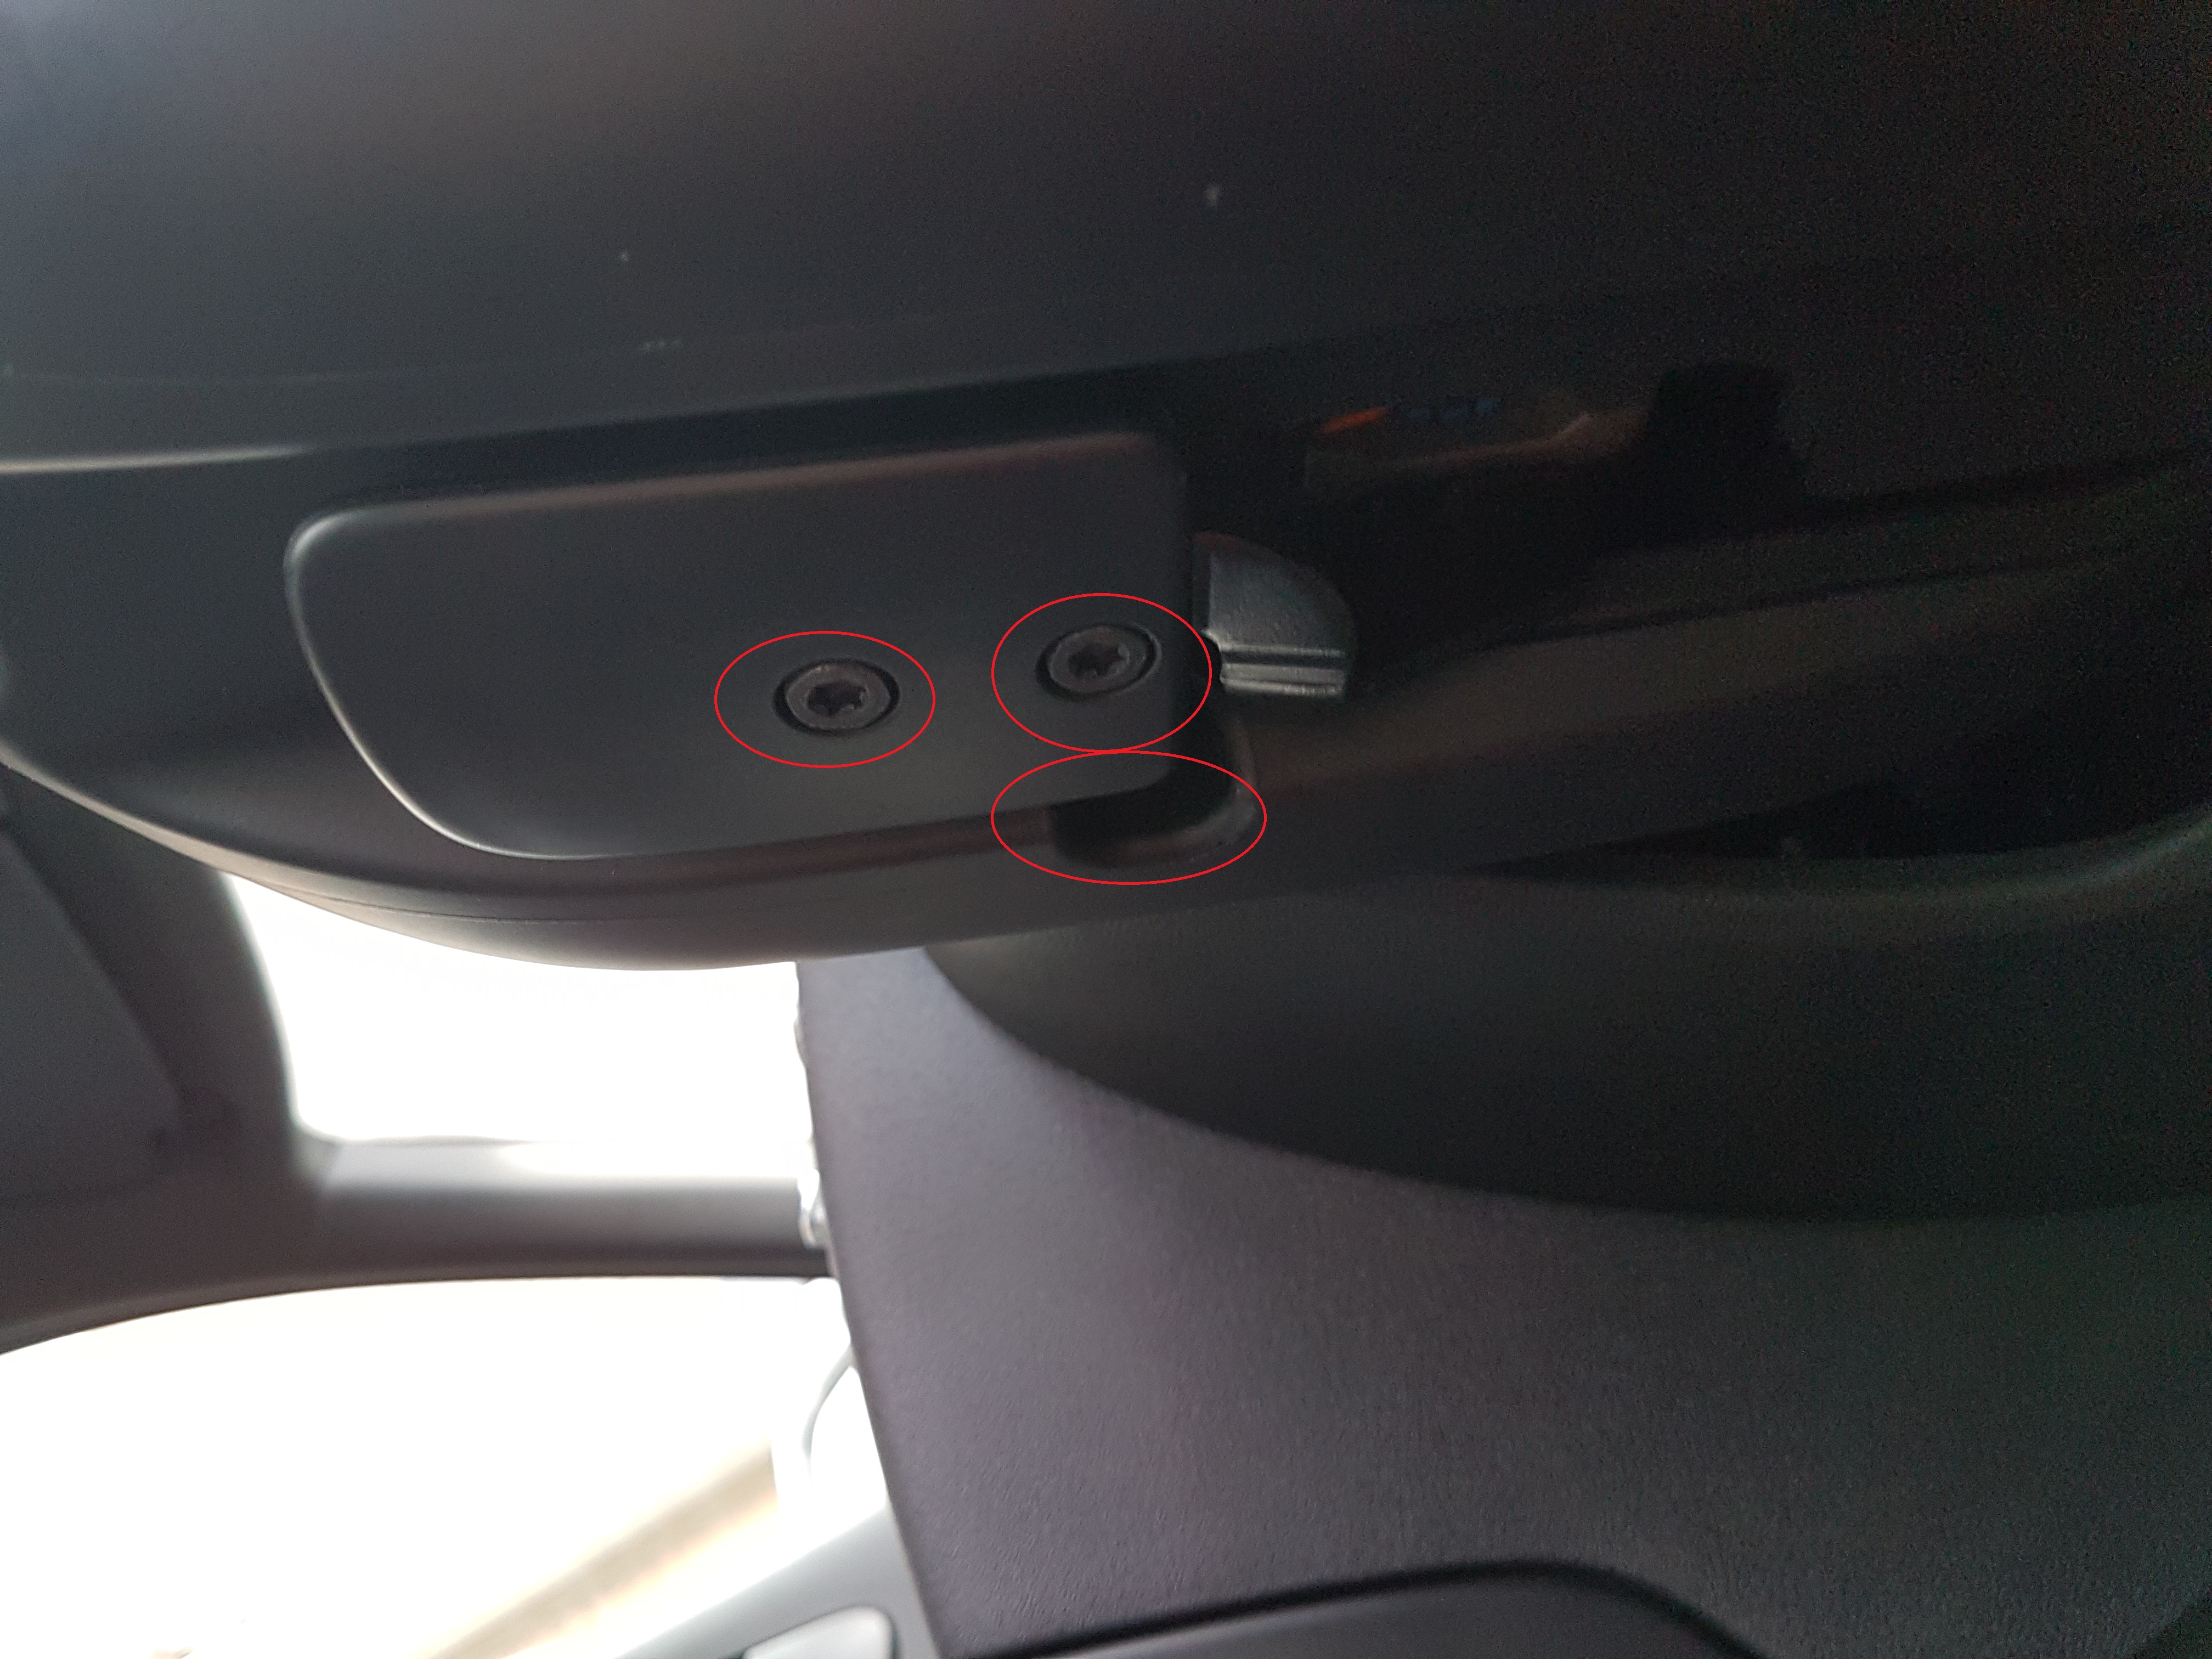
The airbag is held in with two T25 bolts, you have to remove 2 plastic lugs to get at them:
This will more then likely require a combination of fiddling with the torx screw driver and turning the wheel to get too as space is limited between back of steering wheel and speedo.

Once these are undone the bolts dont come out so its best to keep undoing it just to make sure they are fully undone, he airbag will slightly come forward so you should be able to tell when its free.
Make sure the steering wheel is perfectly straight, take key out, pop bonnet and remove the negative terminal on battery.
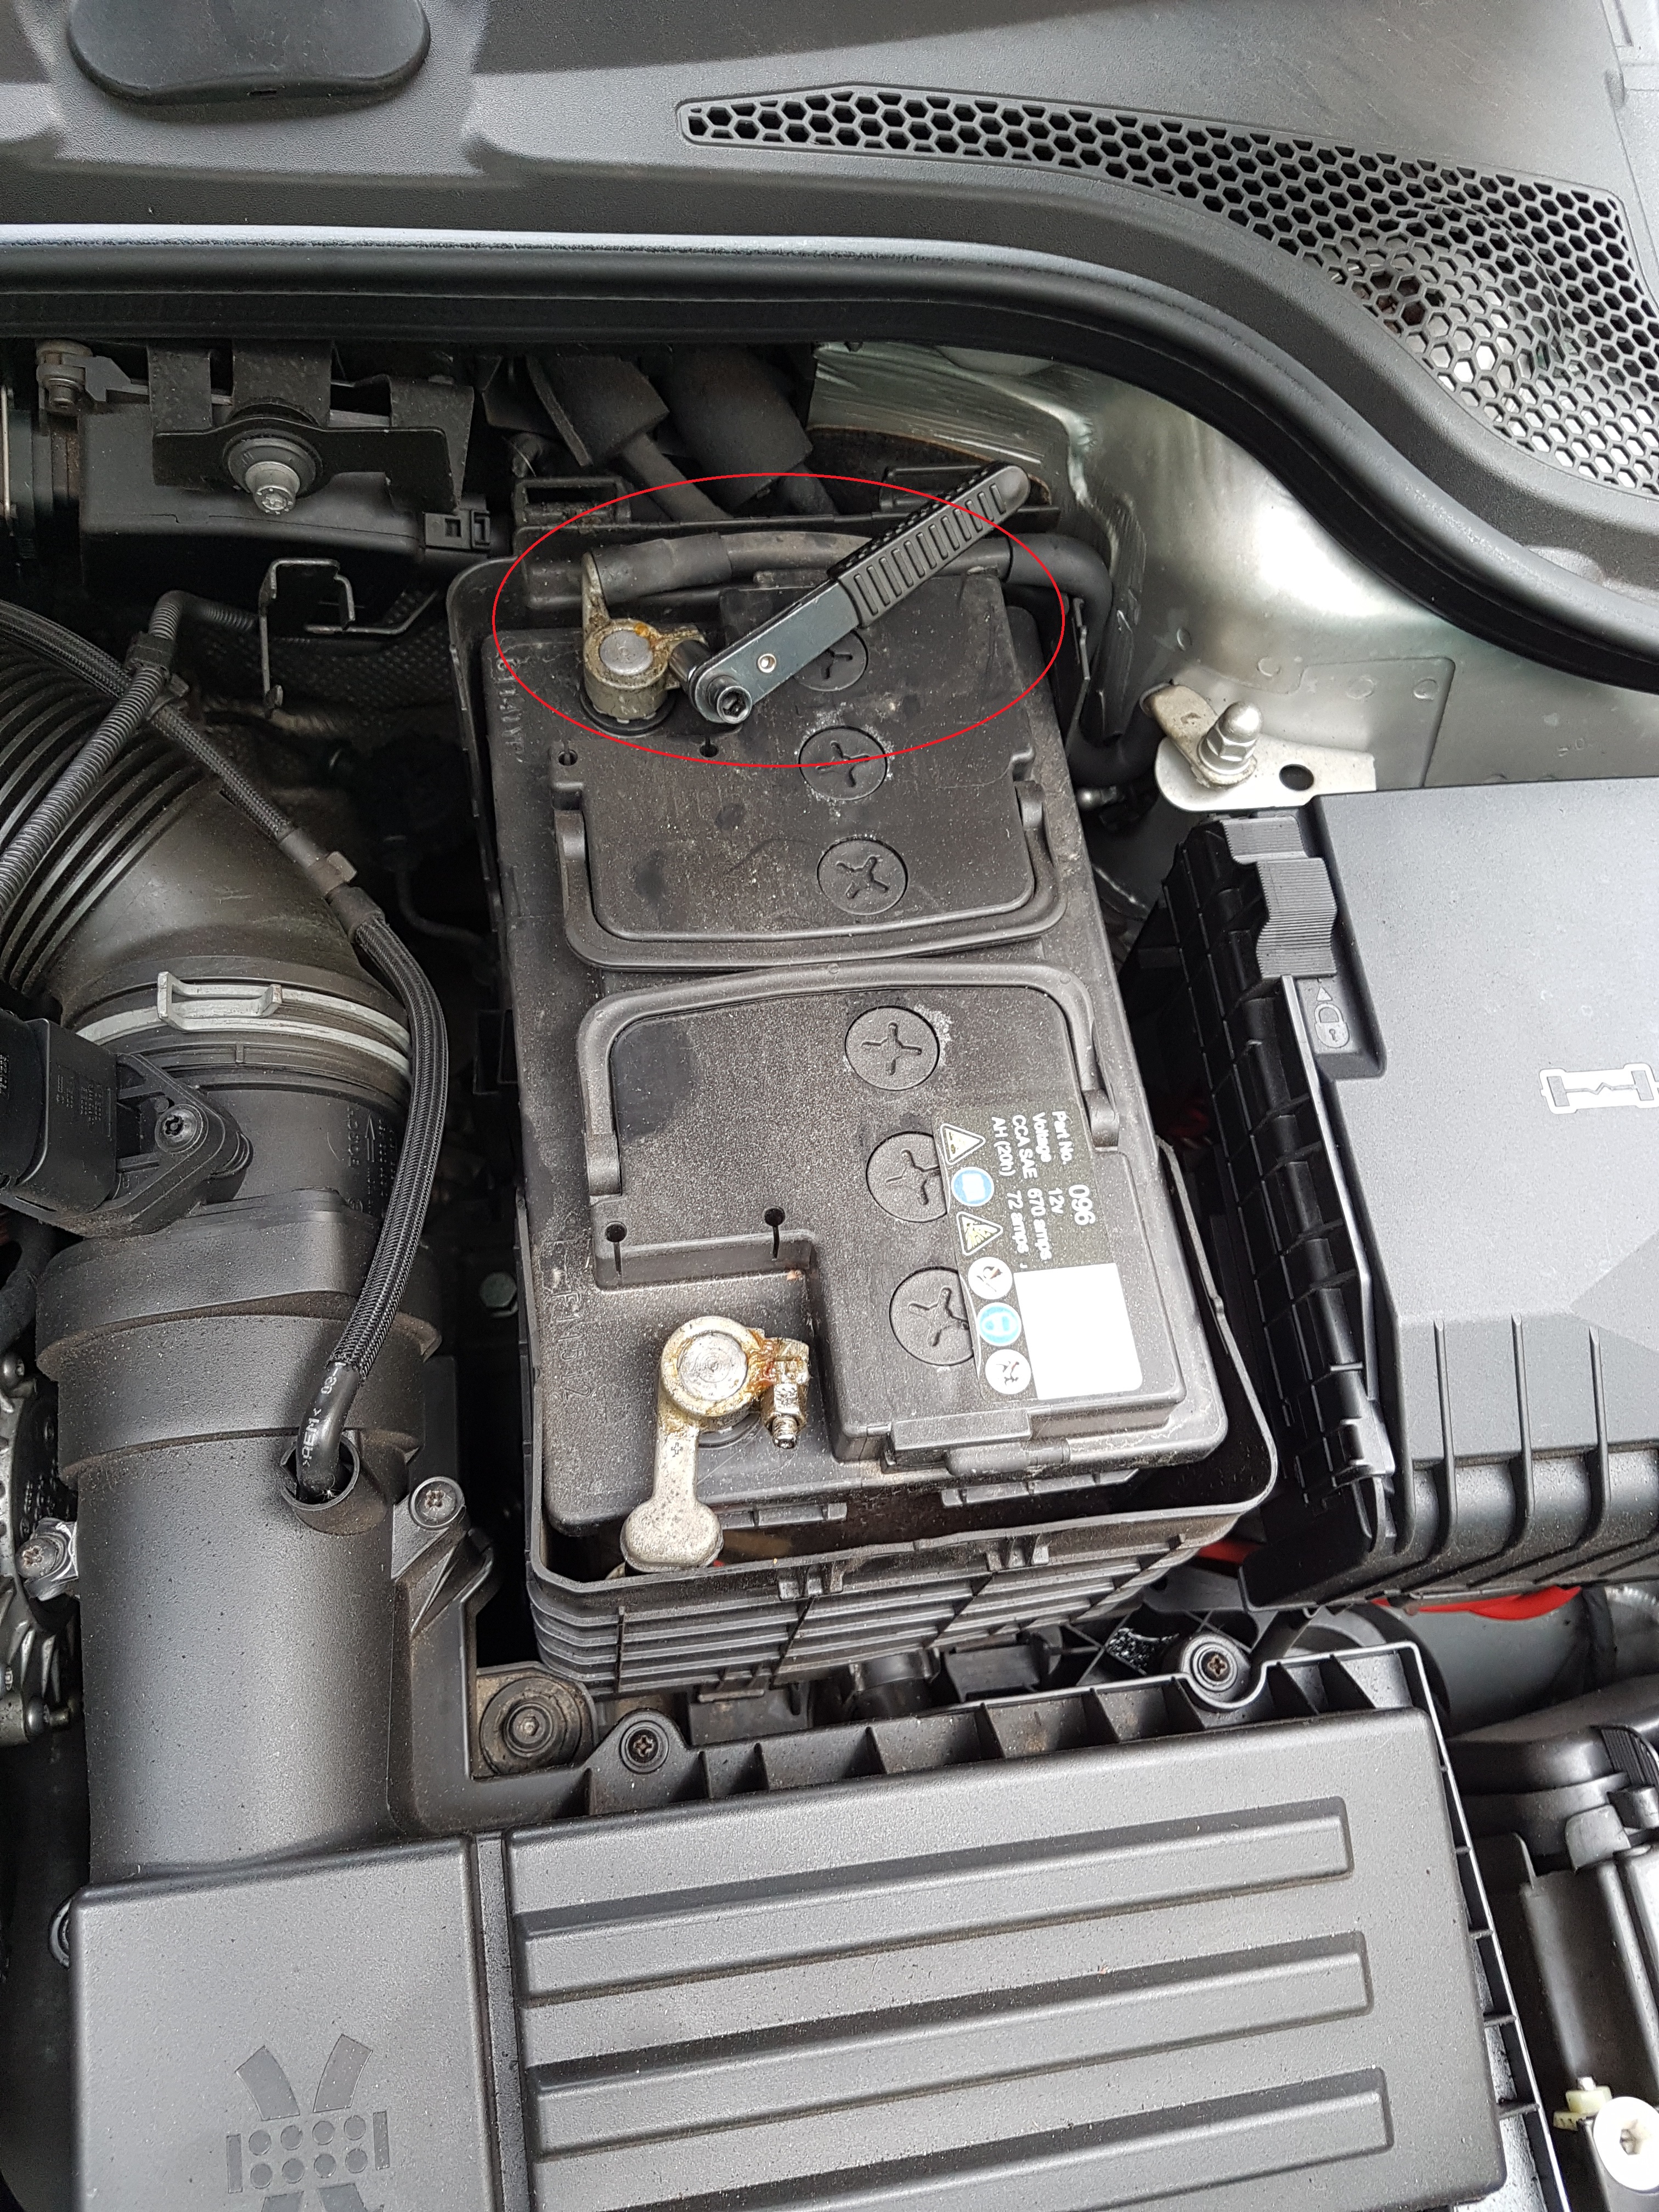
Time for a cup of tea (or coffee) whilst we make sure the is no electrical charge left in the car (wait 30mins at least)

Ok now to remove the airbag, this should just pop forward from the steering wheel now – carefully pull forward but remember its still plugged in so dont just rip it out, lean it forward so you can see and access the back.
The wires might vary slightly depending on what steering wheel you have but in my case it was the main yellow connection into the slip ring as pictured:
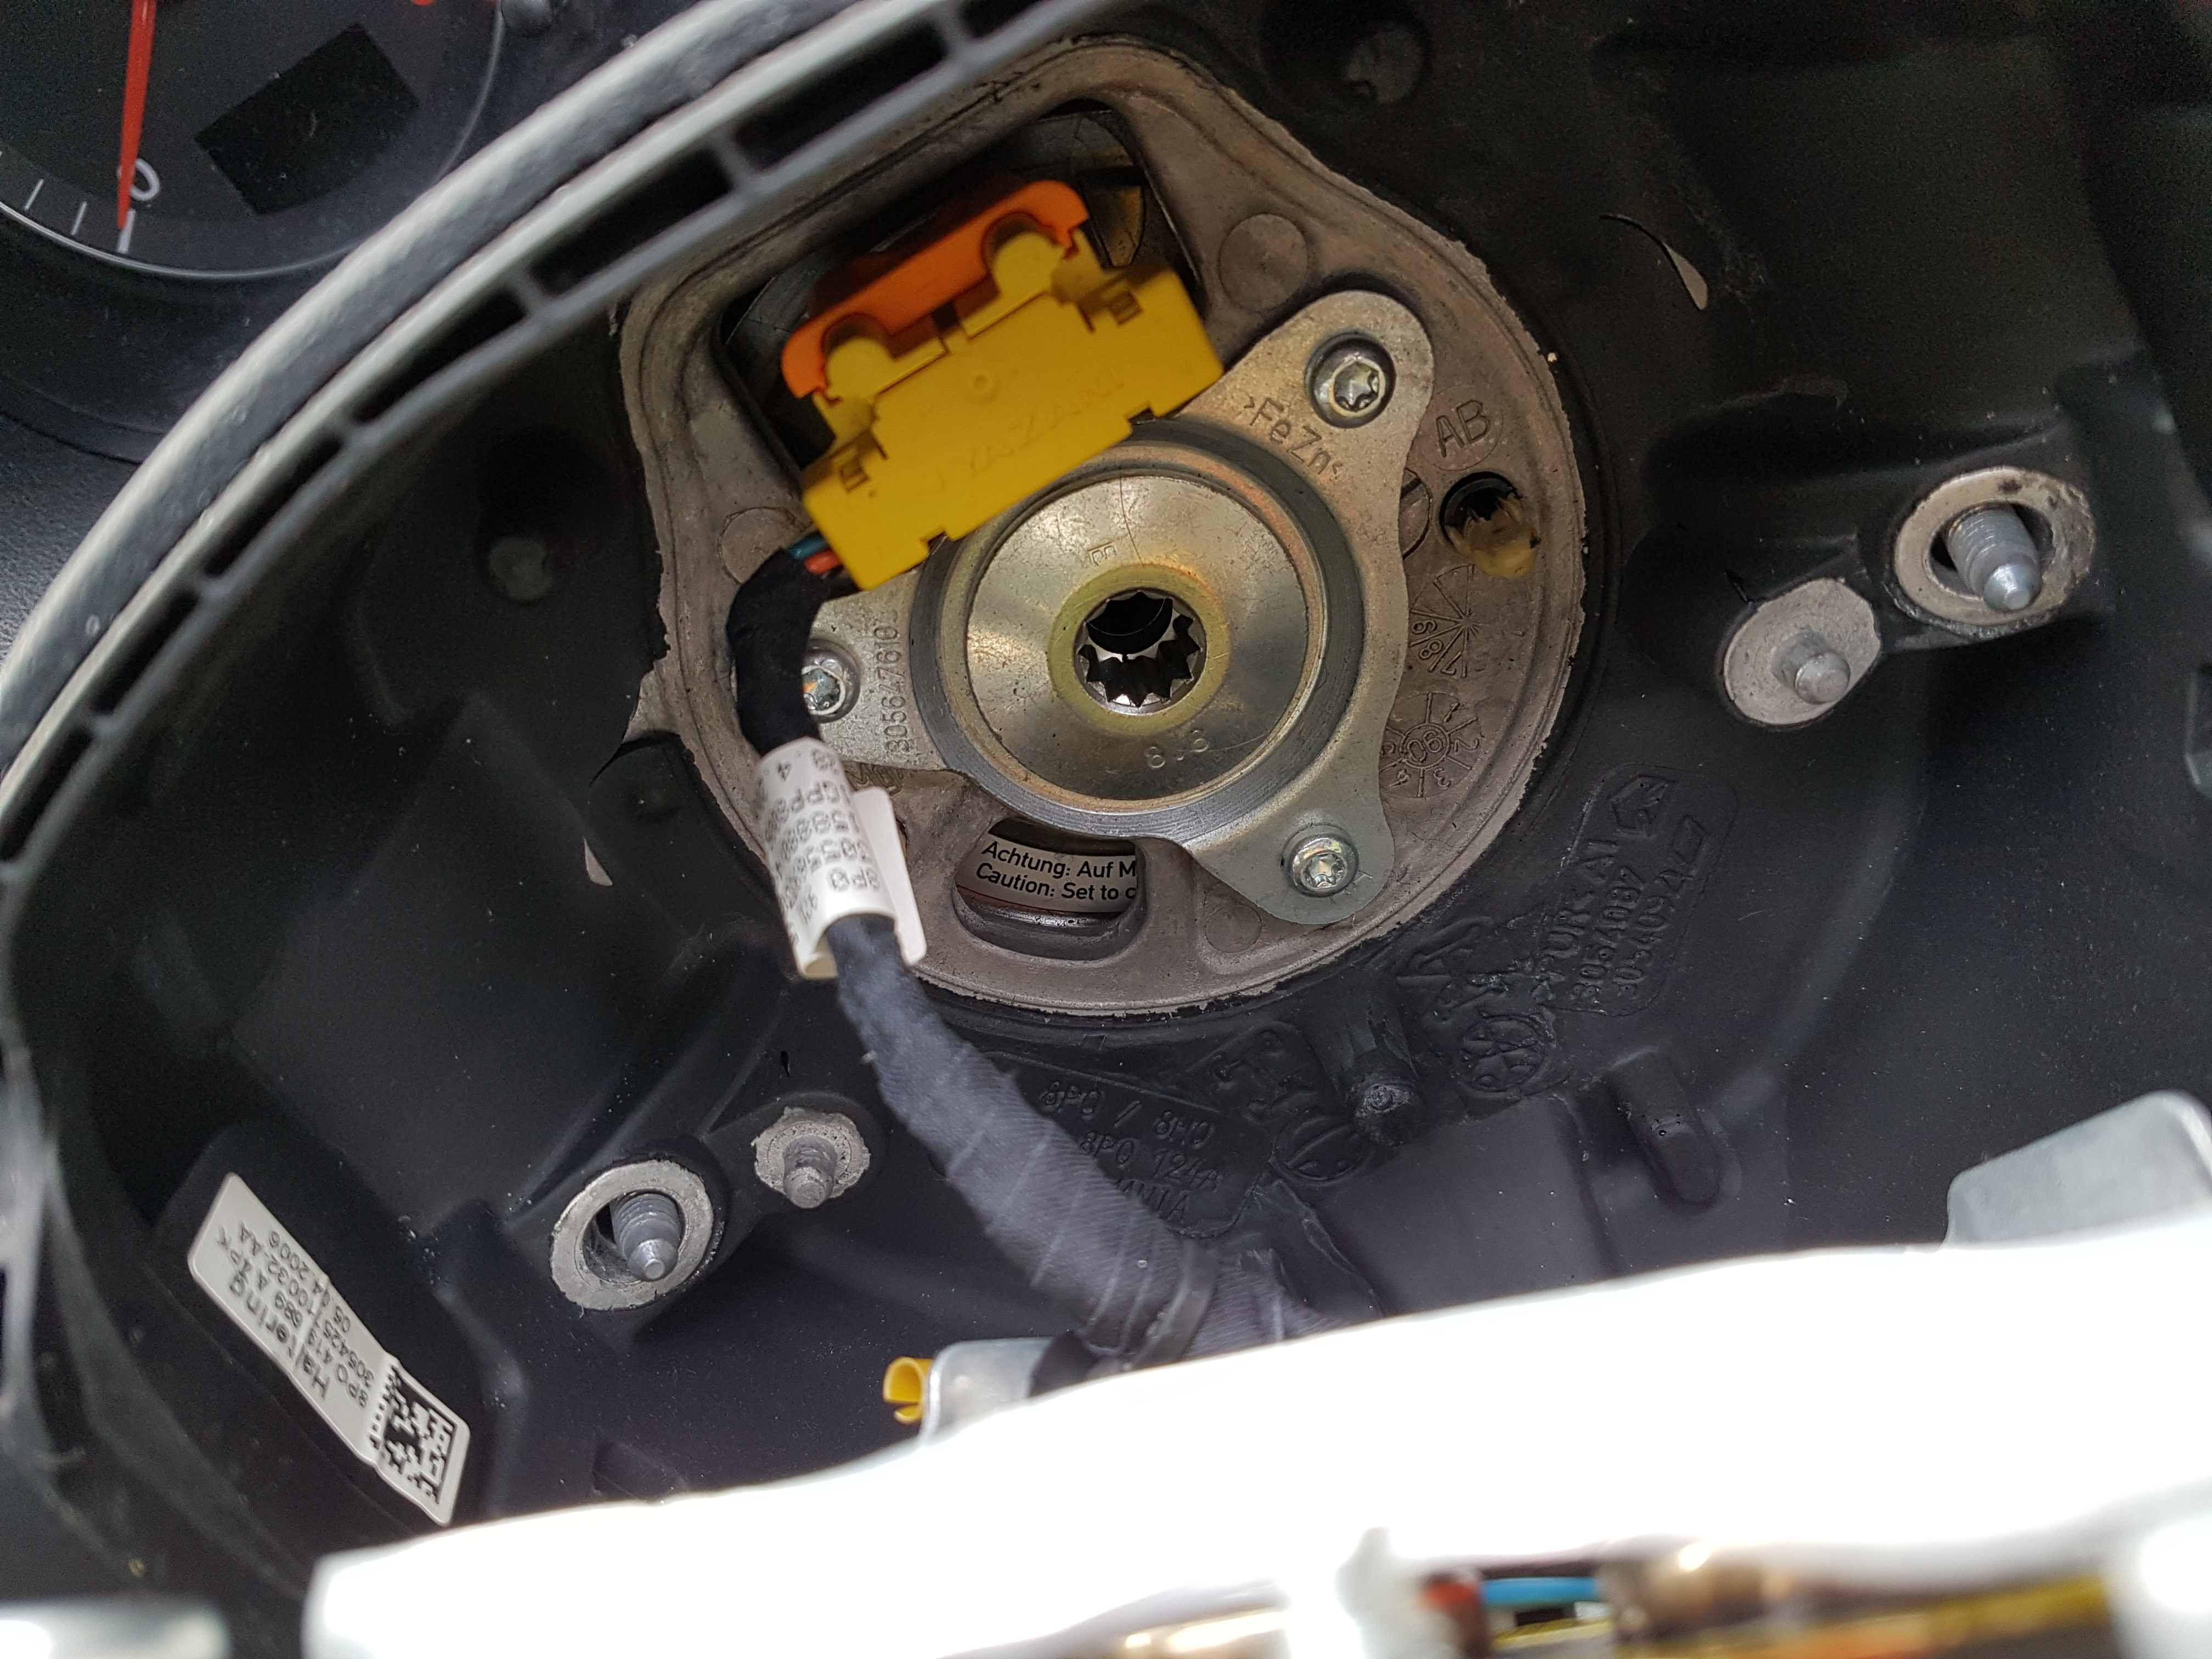
The connector has an orange clip, pushing on this will release the main yellow connector and it should just easily pop off.
Note: if it doesn’t easily pop off dont force it, take time and check the orange clip is pushed in.
Once off put this carefully to one side, i placed it away from me in the passenger footwell with Audi logo facing up just incase it does for whatever reason trigger (very very unlikely without power to it) it doesn’t shoot up like a rocket and potentially hurt someone.

Step 2: Remove Steering Wheel + Picture Alignment
To remove the steering wheel this is held in place with a good sized centre bolt (M12 Spline)

This will undo and come out, with bolt out of the way its worth noting and taking a picture of the alignment so you can get it just right when you put it back.
In most cases the two marks on the steering wheel and steering rack will line up but a pictures always good to have:

Once done remove steering wheel and place out of the way.
Step 3: Remove Plastic Cowling/Surround
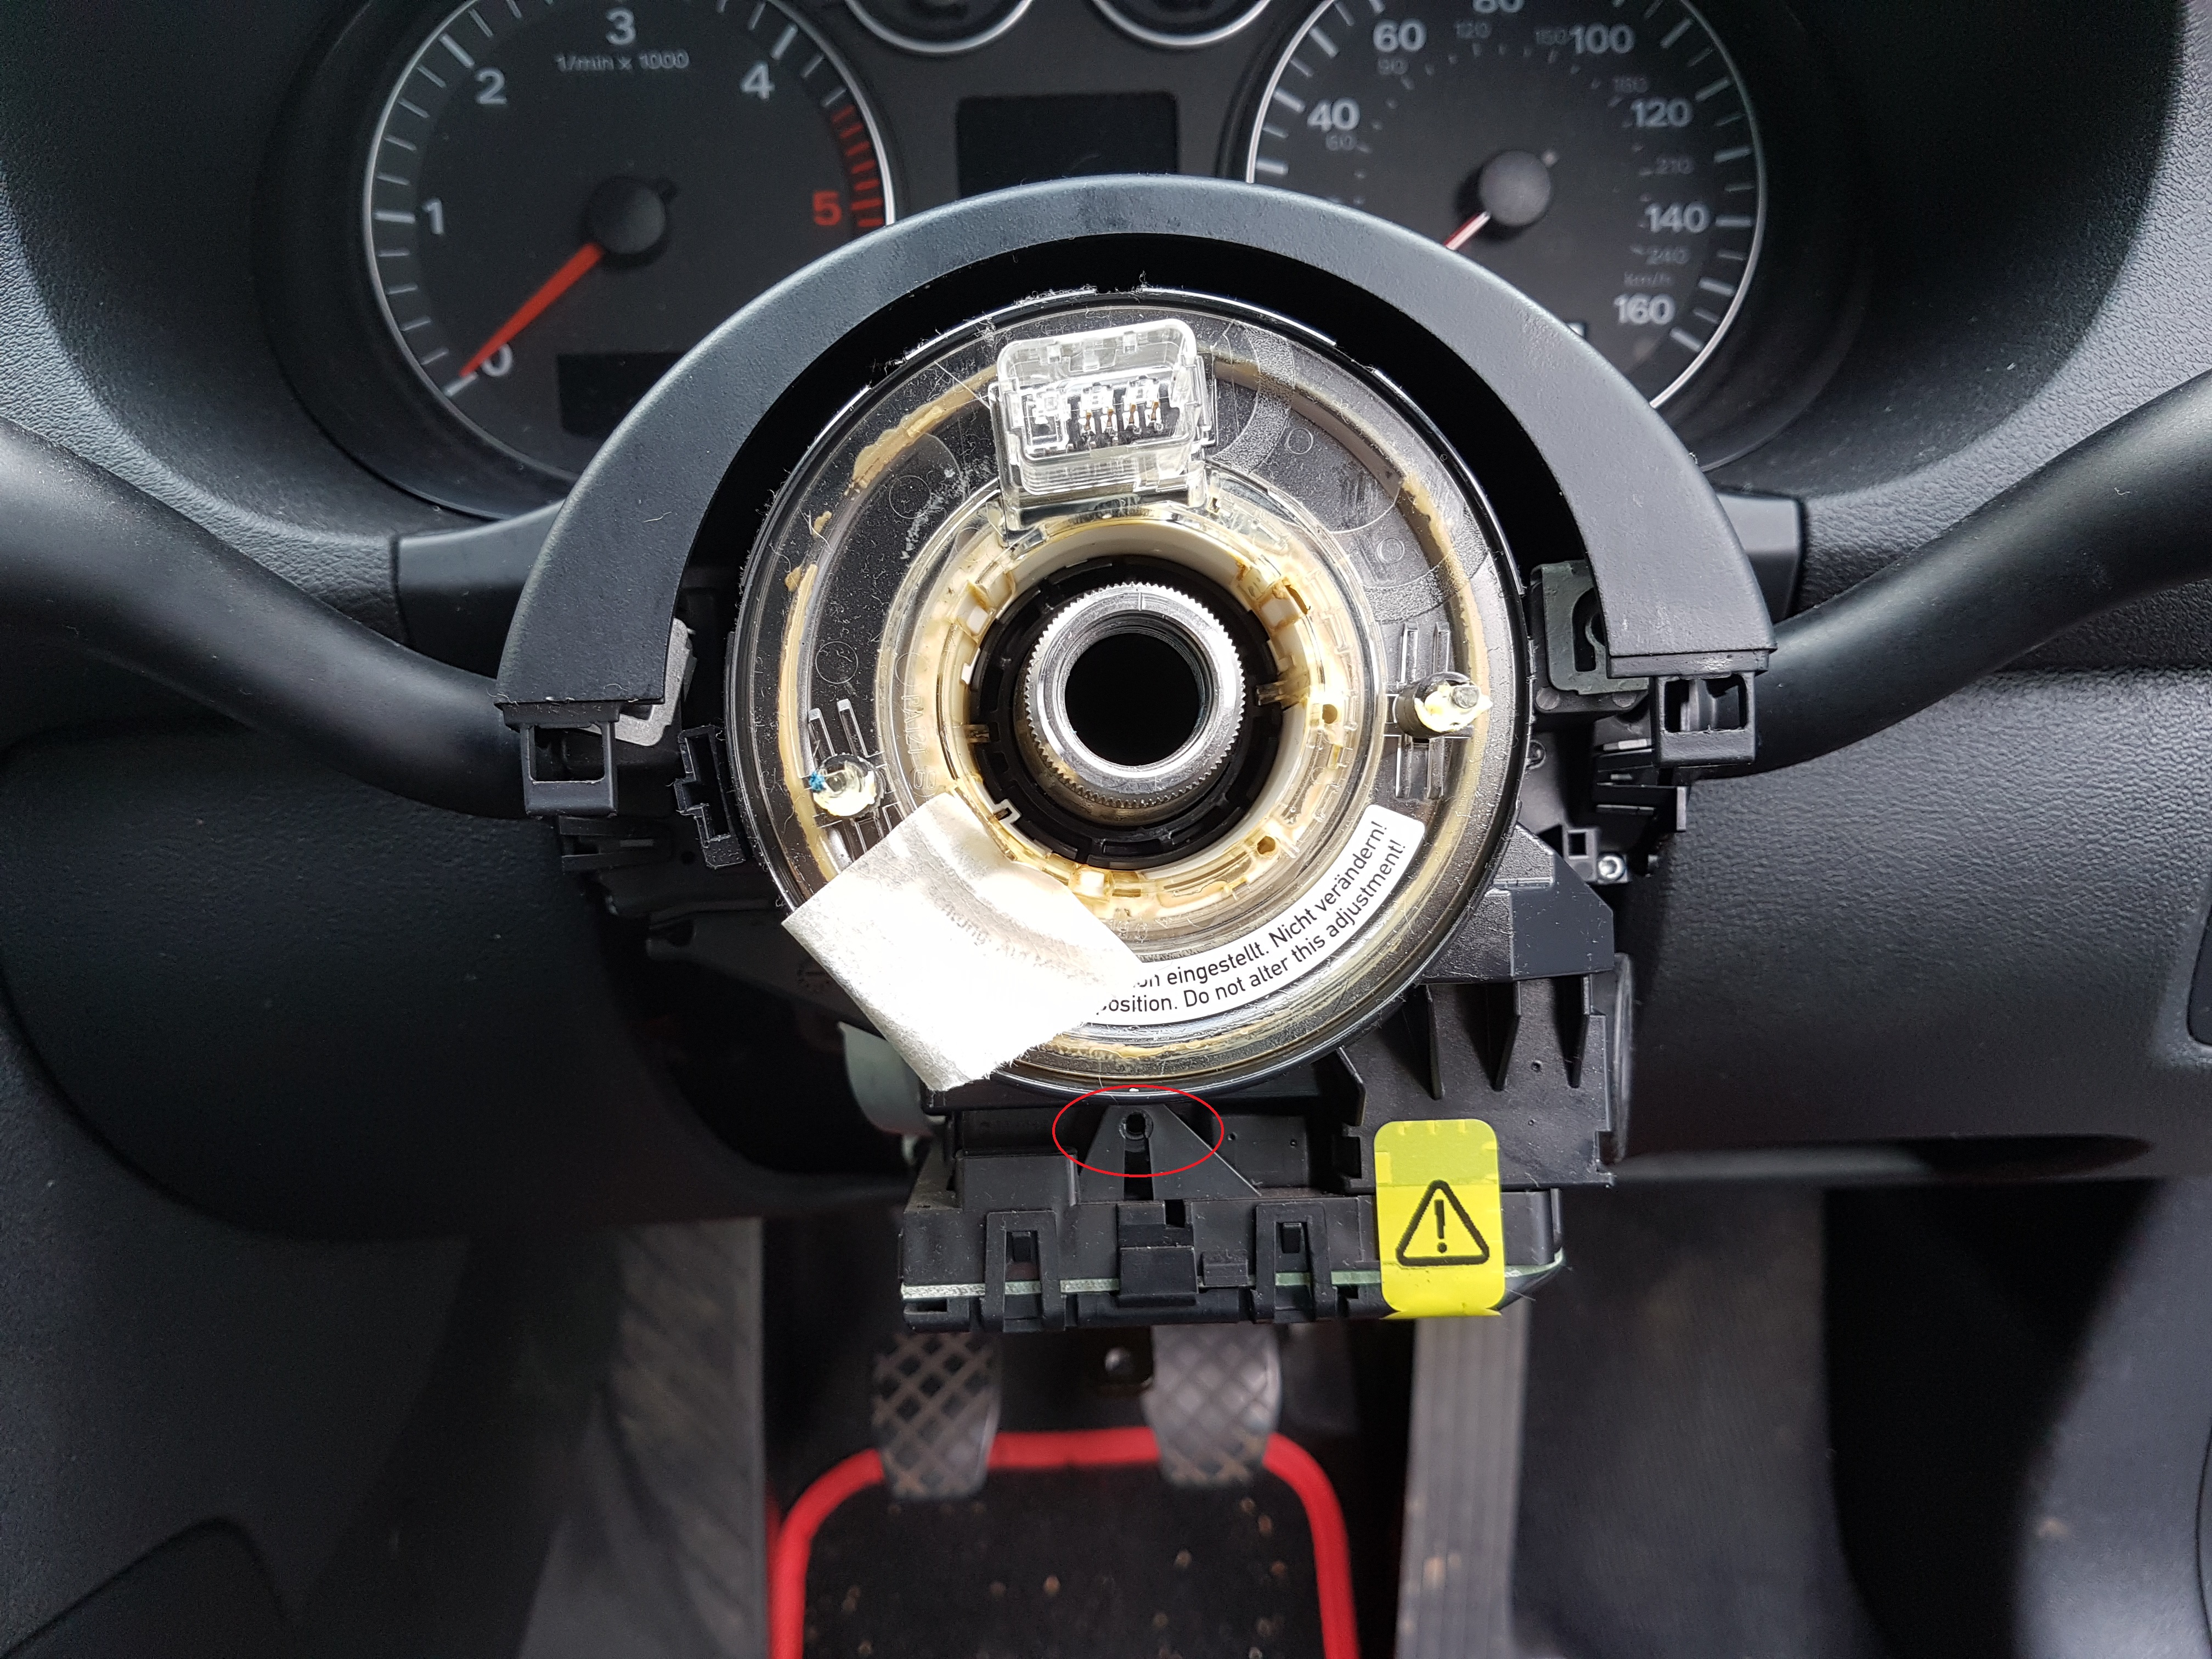
Firstly we have to undo the adjustment handle on the underside of the column, Its held in place with a total of 3 T25 Screws, as show in the picture below:
Once this is undone the cowling (upper part) should hinge up and will reveal the location of 2 T25 screws on the front.

Plastics should come away, can be a bit fiddly go careful not to pull wires or more importantly disturb the centre plastic slip ring.
Note: I have seen on another website a good tip for not disturbing slip ring position, place tape on it to stop it moving
Step 4: Remove Steering ECU
This is said to be one of the most fiddly and annoying parts of this process, but its fairly simple when you know where to look.
Firstly for information this is held in place by:
- 1 x T9 Screw at front (should be visible)
- 1 x Front plastic clip
- 1 X Rear plastic clip
- 2 x Rear electrical connectors
I started by removing the yellow connector at the back, this is spring loaded and will pull off.
Next i removed the front T9 screw, to allow the ecu to move when we undo the actual holding clips.
I then fiddled with the back clip this when you feel it will just push in, its situated to one side of where the black connector is.
When you unclip it the ECU will drop down at the back.
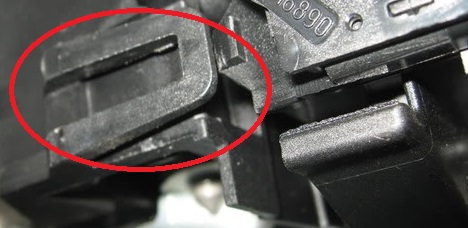
The front clip is a little more involved, this is released with a small long screw driver or Allen key down a chamber as pictured:
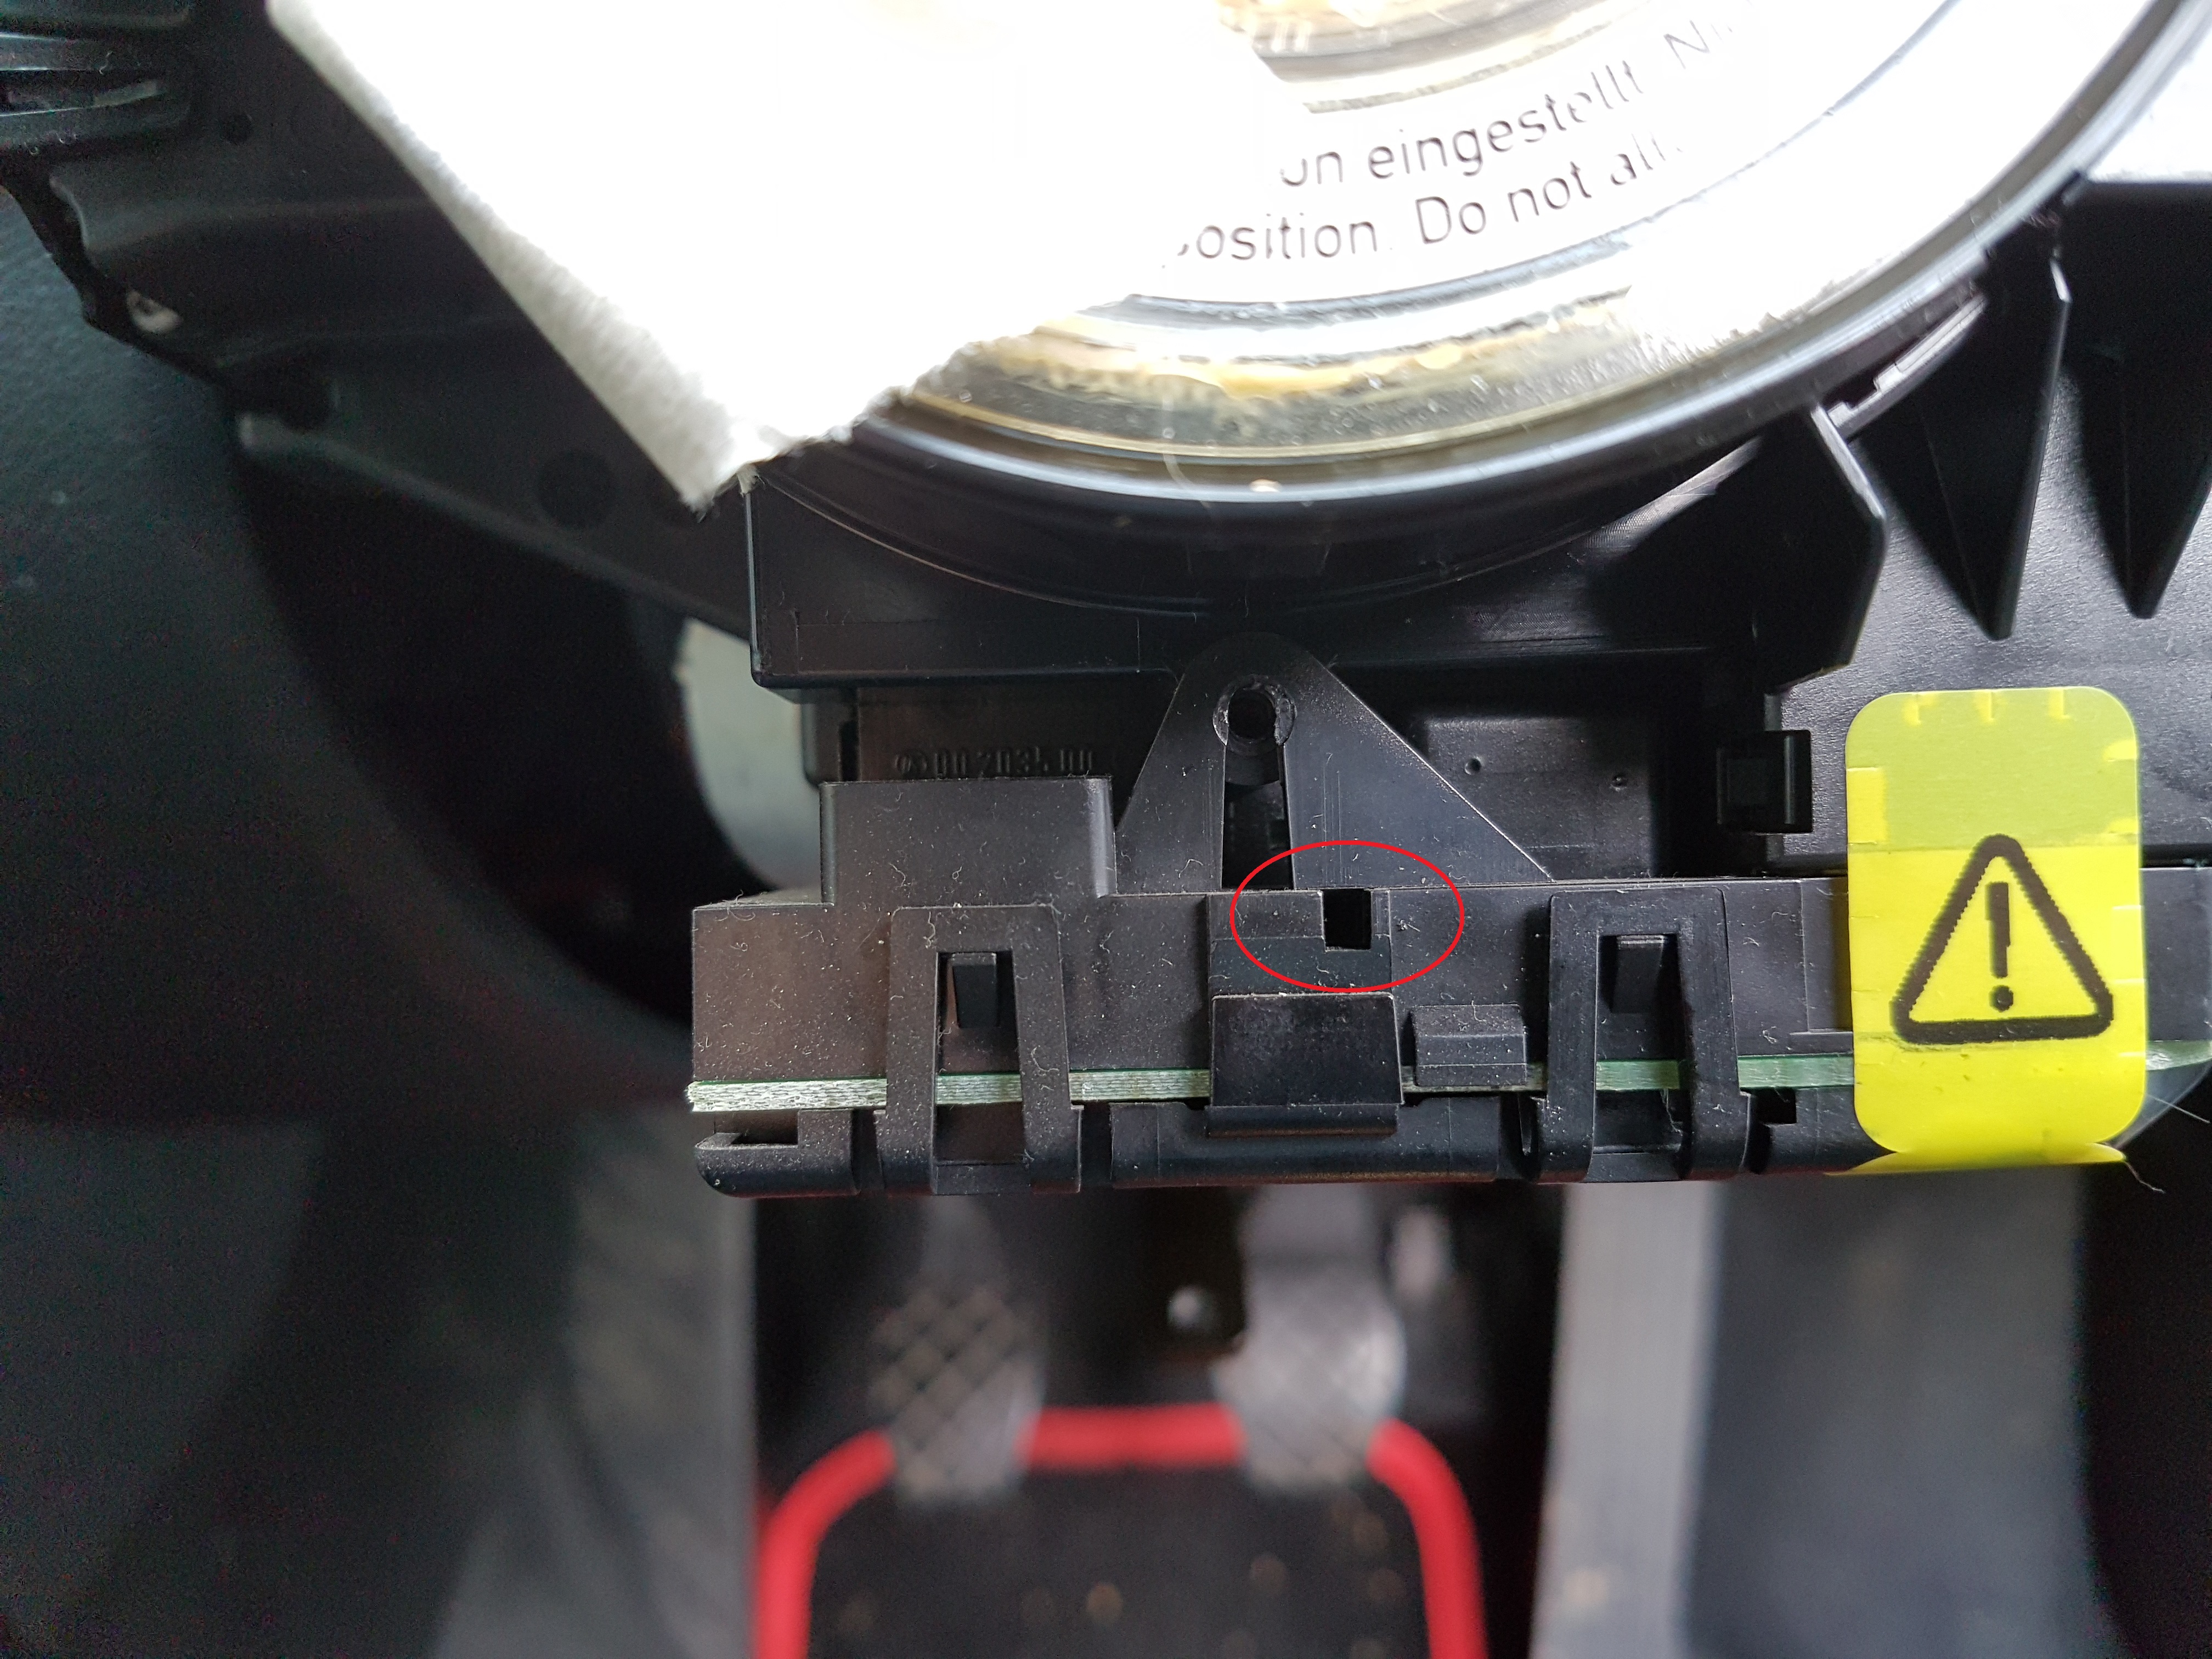
When you hit this the ECU should just drop down, i didn’t unplug the black connector the is enough room for you just to “drop” this down and work.
I have found a video of someone showing this on a golf MK5, looks to be same module – which shows both clips perfectly:
LINK (not my video fully credits go to the author)
Step 5: Remove Slip Ring (carefully)
The slip ring is held in place by two plastic clips:
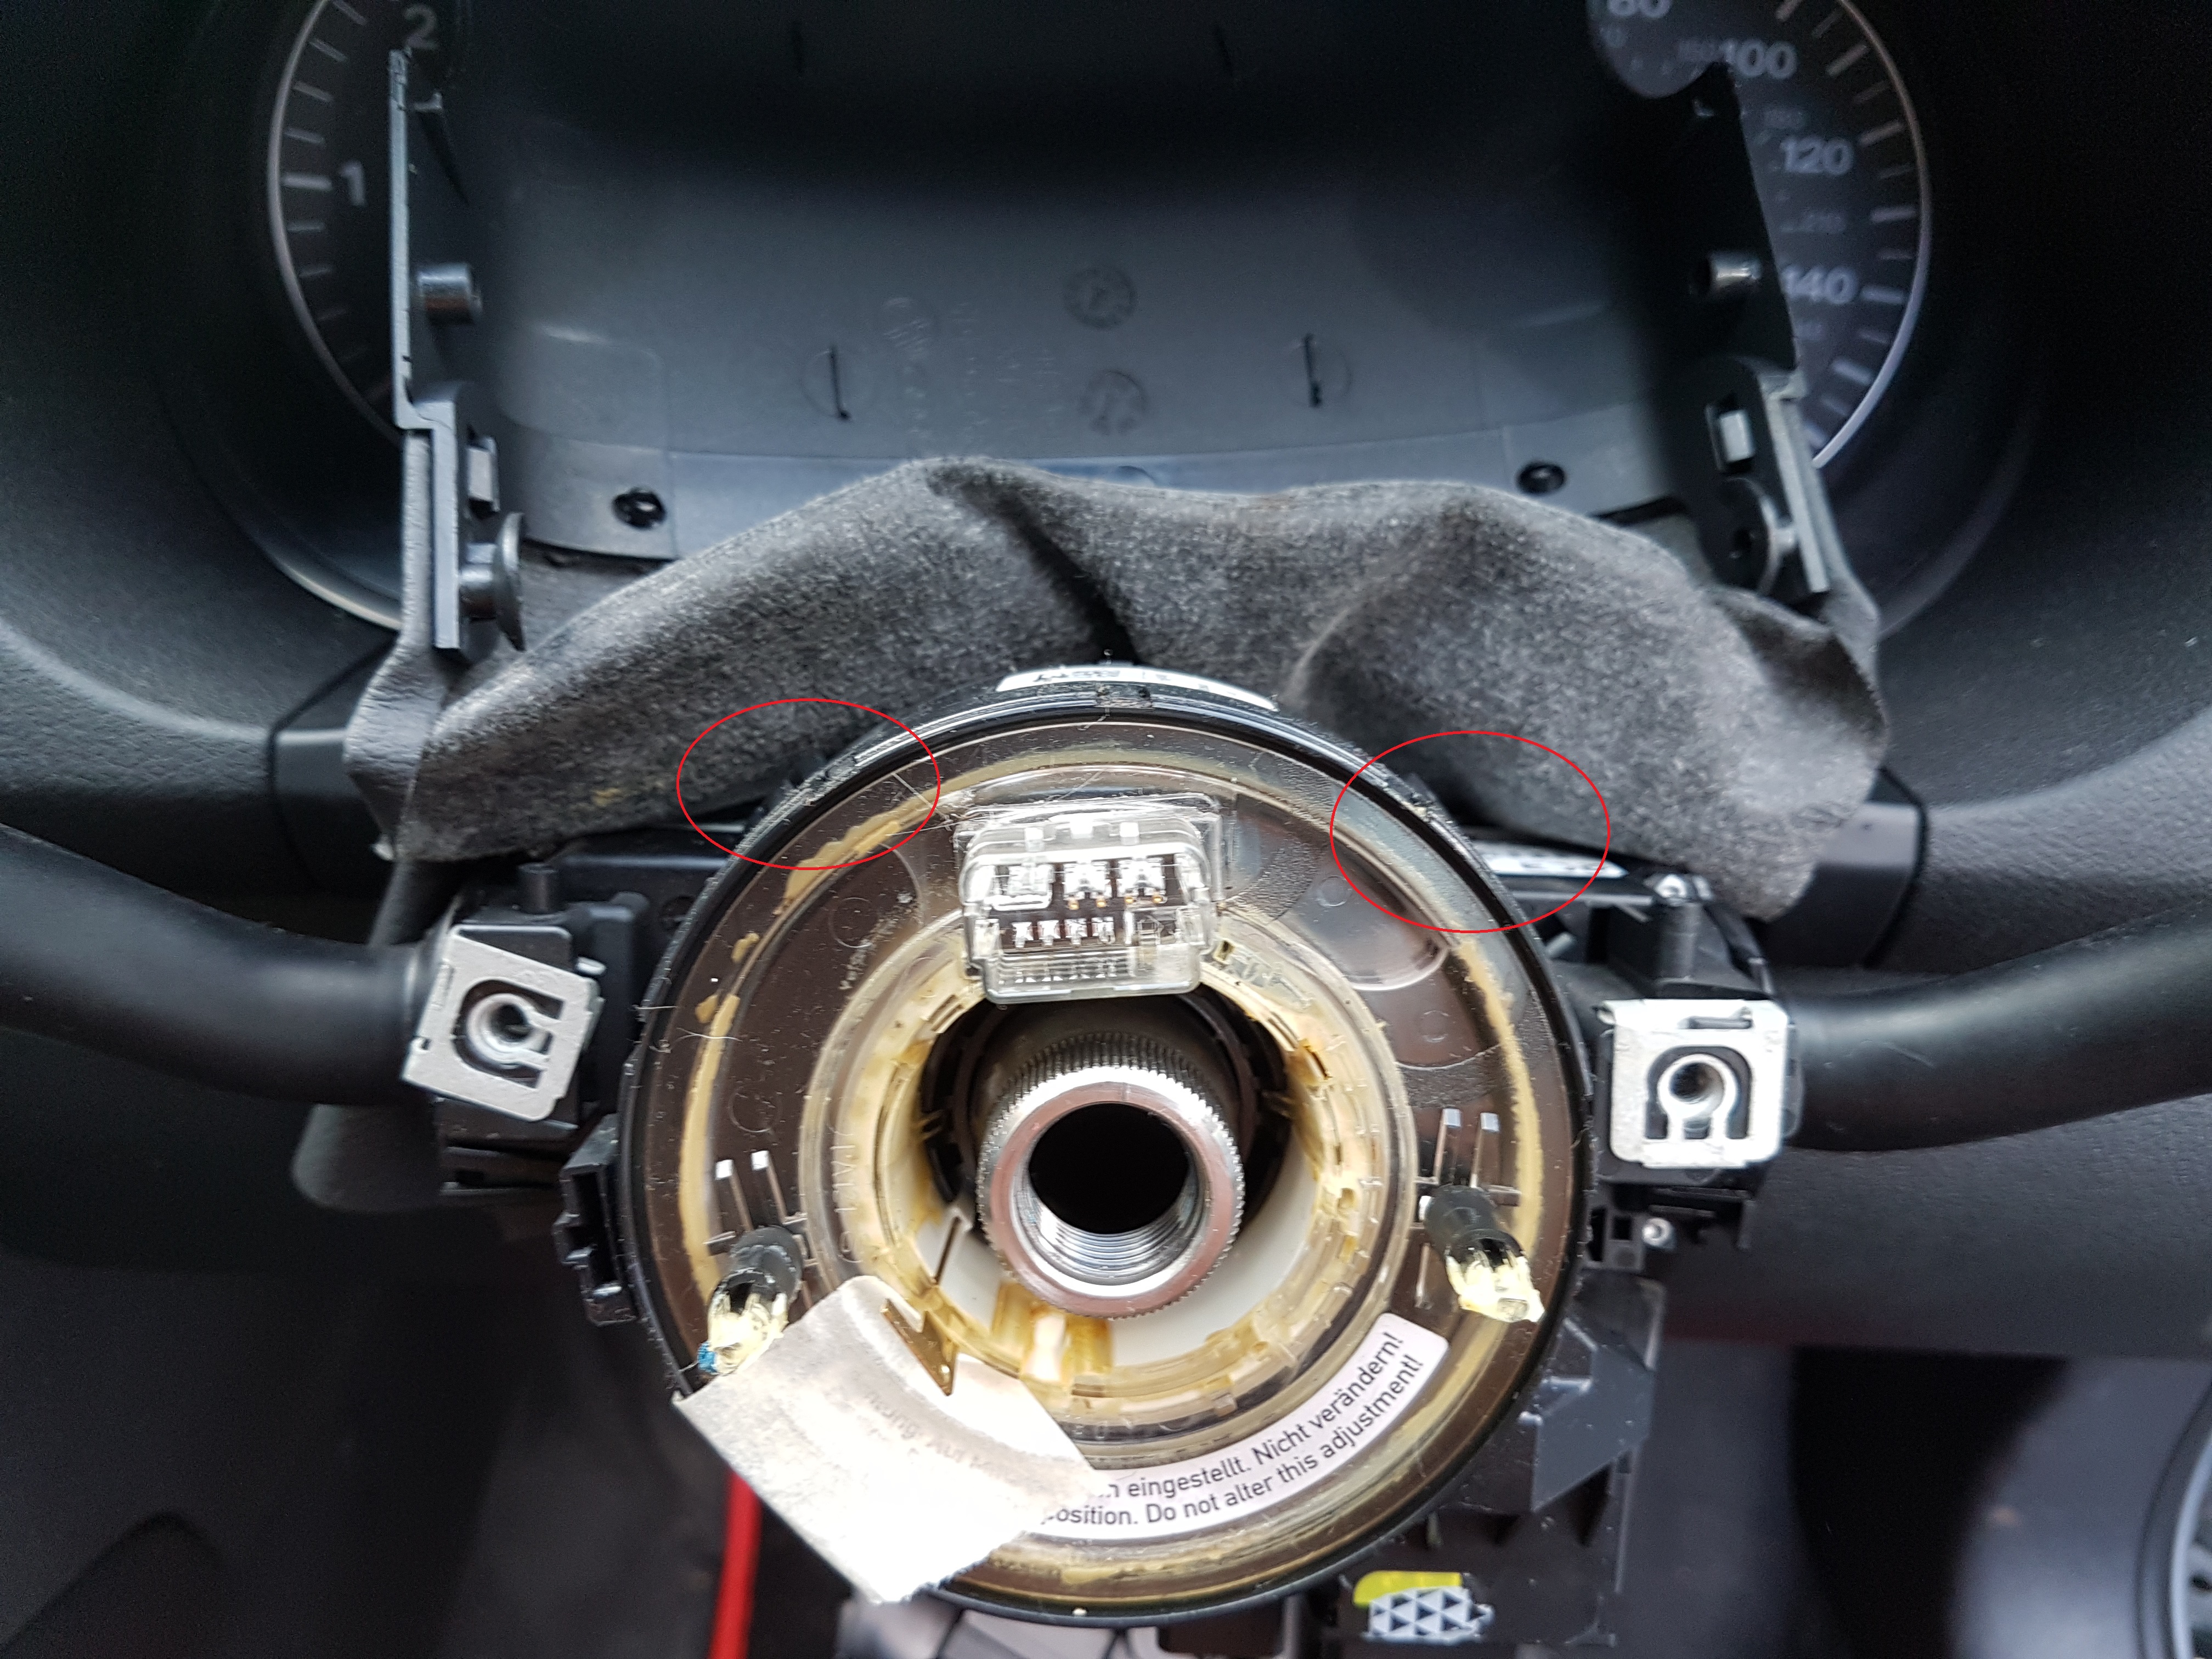
Once unclipped slip ring will carefully slide off
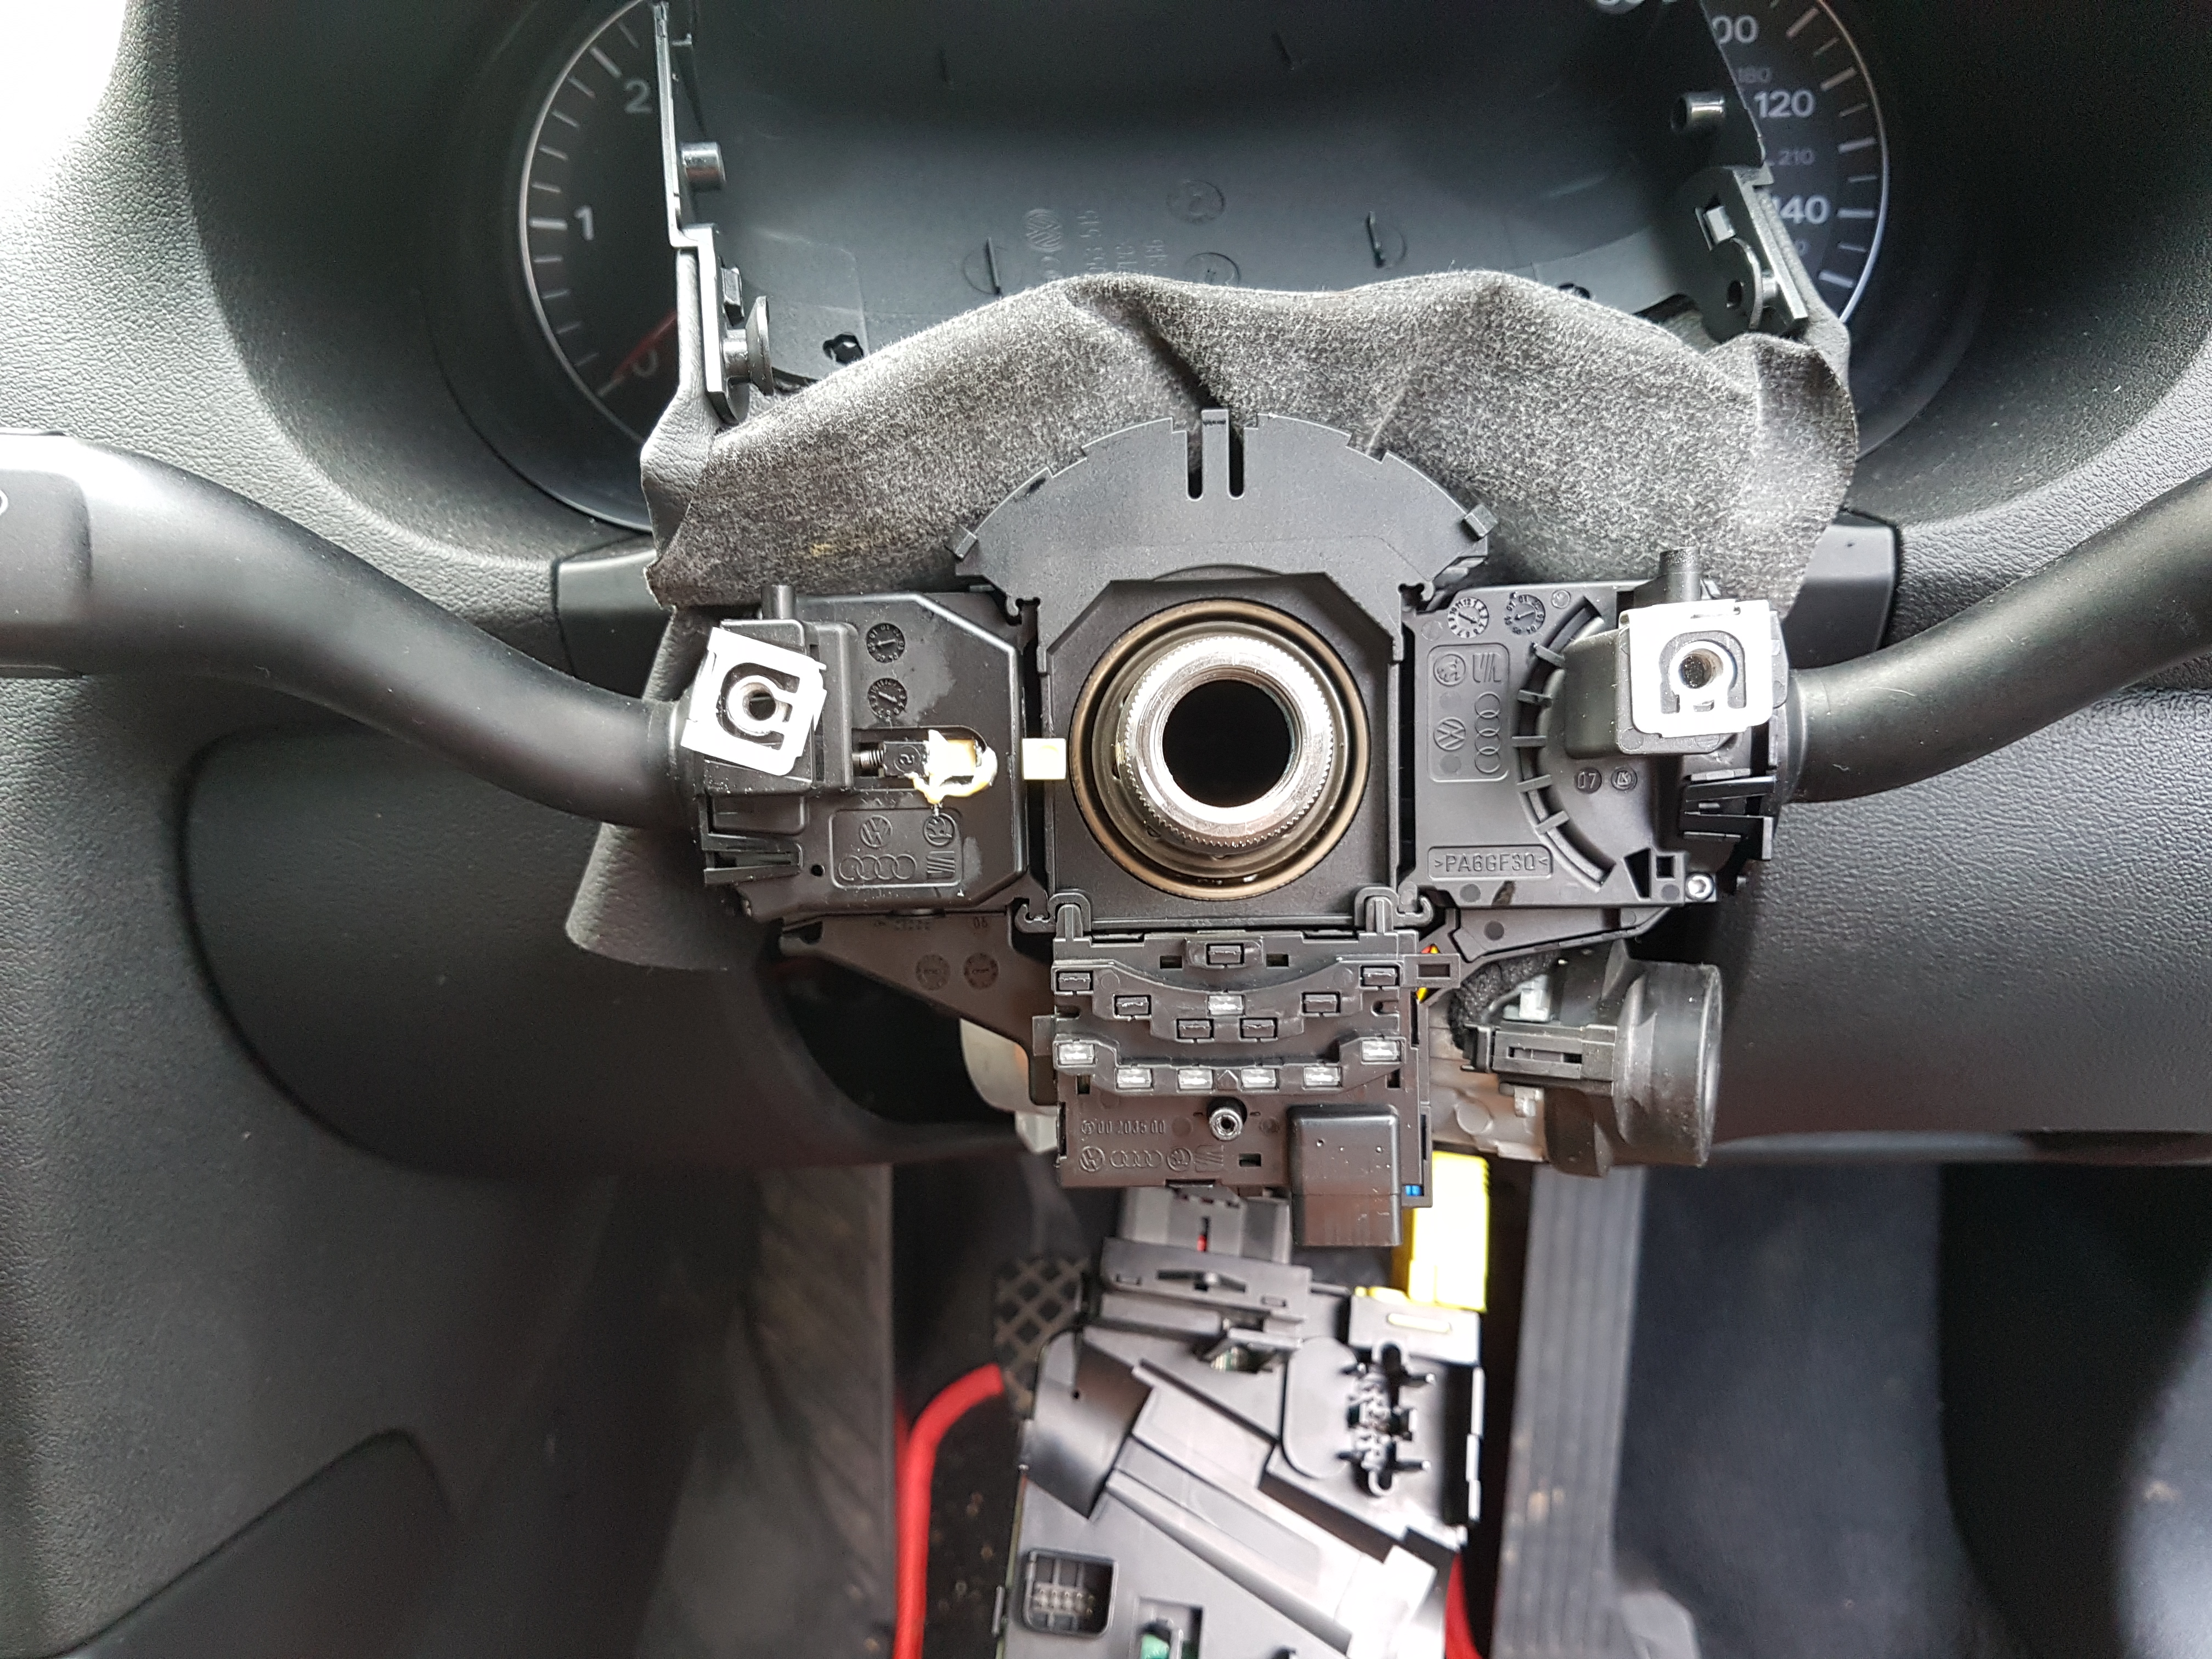
Step 6: Remove ESP Sensor
This is easy, situated at the bottom as pictured:

It will just slide forward and come out, put this to one side for now.
Step 7: Switch stalk for one with cruise
The stalk is held in place by a clip towards the left hand side at the back
When unclipped this will slide off
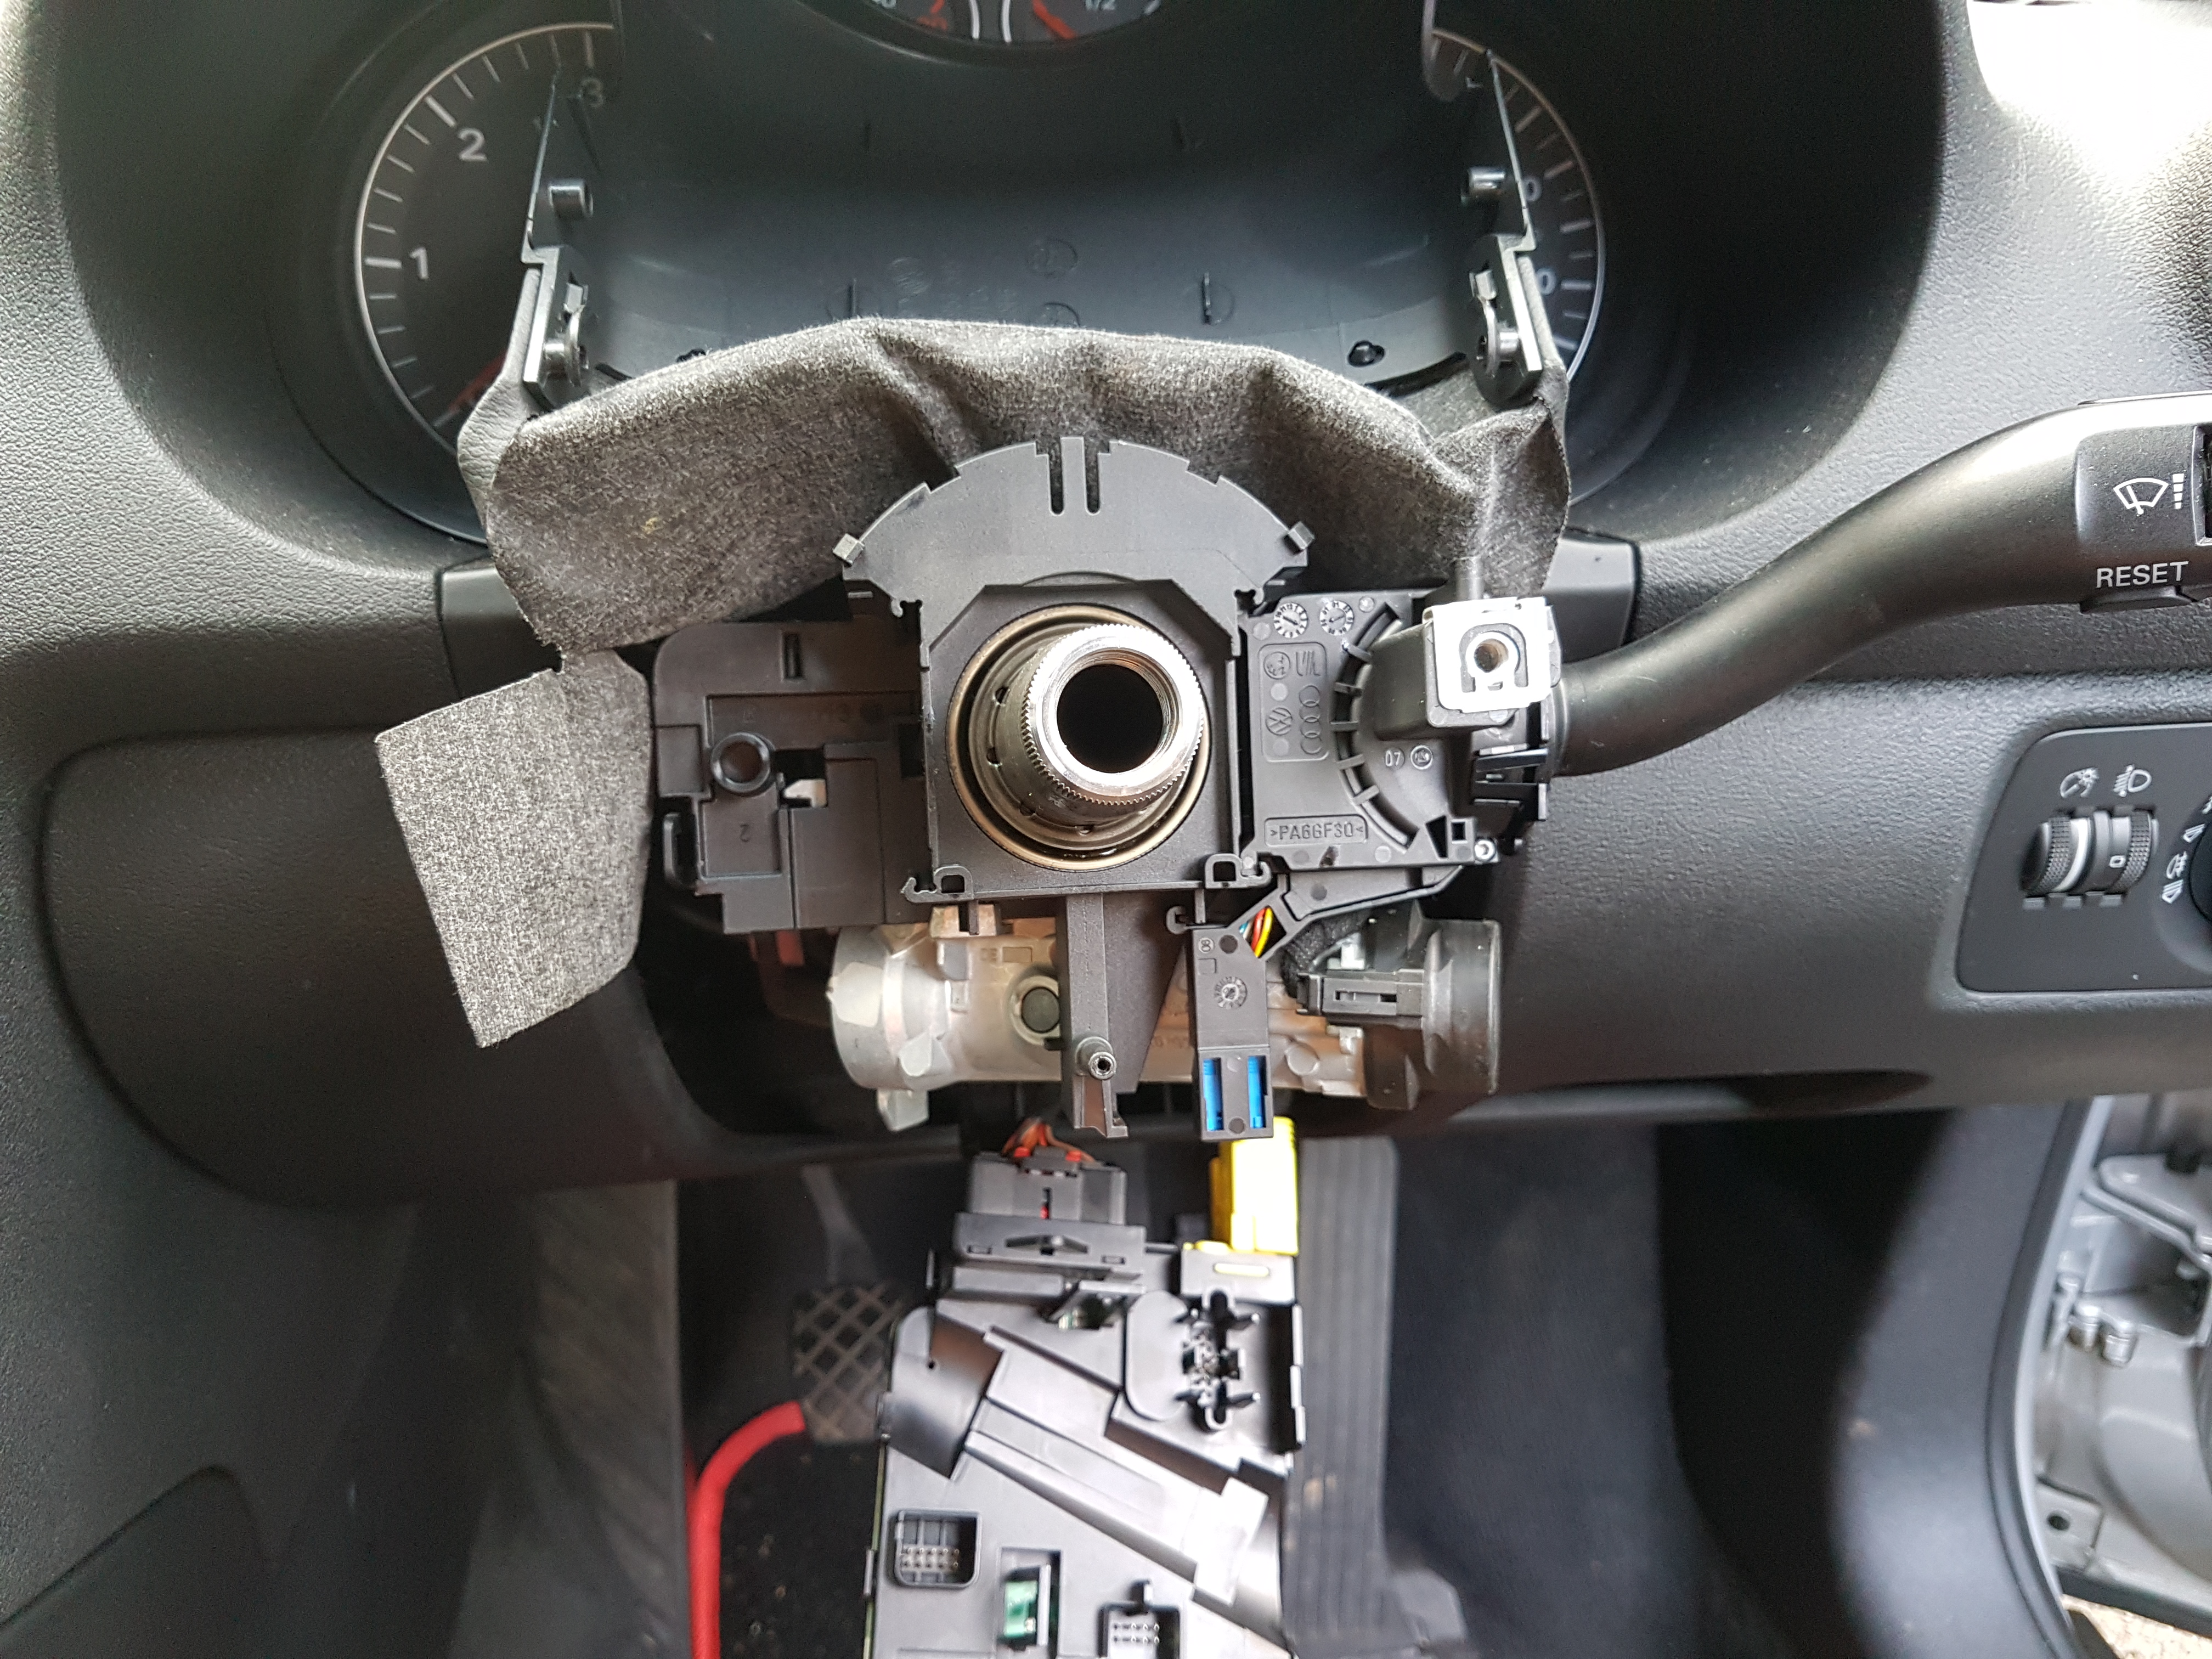
You will then be able to slide the new one in its place.

Step 8: Put it all back together!
Just slowly and carefully reverse the above steps
- ESP Sensor Back on
- Slip Ring
- ECU + Connectors + T9 Screw
- Plastic cowling back on (using the new one that fits the cruise stalk)
- Adjustment handle + Screws
- Steering wheel – Make sure the alignment is right (use markings + picture as reference)
- Airbag back in (make sure its connected + and screws back in)
Step 9: Code With VCDS
To code this in the is 2 changes needed the first is in the engine
[Select]
[01 – Engine]
[Login – 11]
Enter 11463 to activate cruise control
[Do It!]
The second coding change is
[Select]
[16 – Steering Wheel]
[Coding]
Change the coding as per:
00xxx?x: Cruise Control/Board Computer
0 = no Board Computer, no Cruise Control
1 = Board Computer, no Cruise Control
2 = no Board Computer, Cruise Control
4 = Board Computer, Cruise Control
Thats it, clear out any error codes you may have triggered and go test!
Its beer o clock time now.